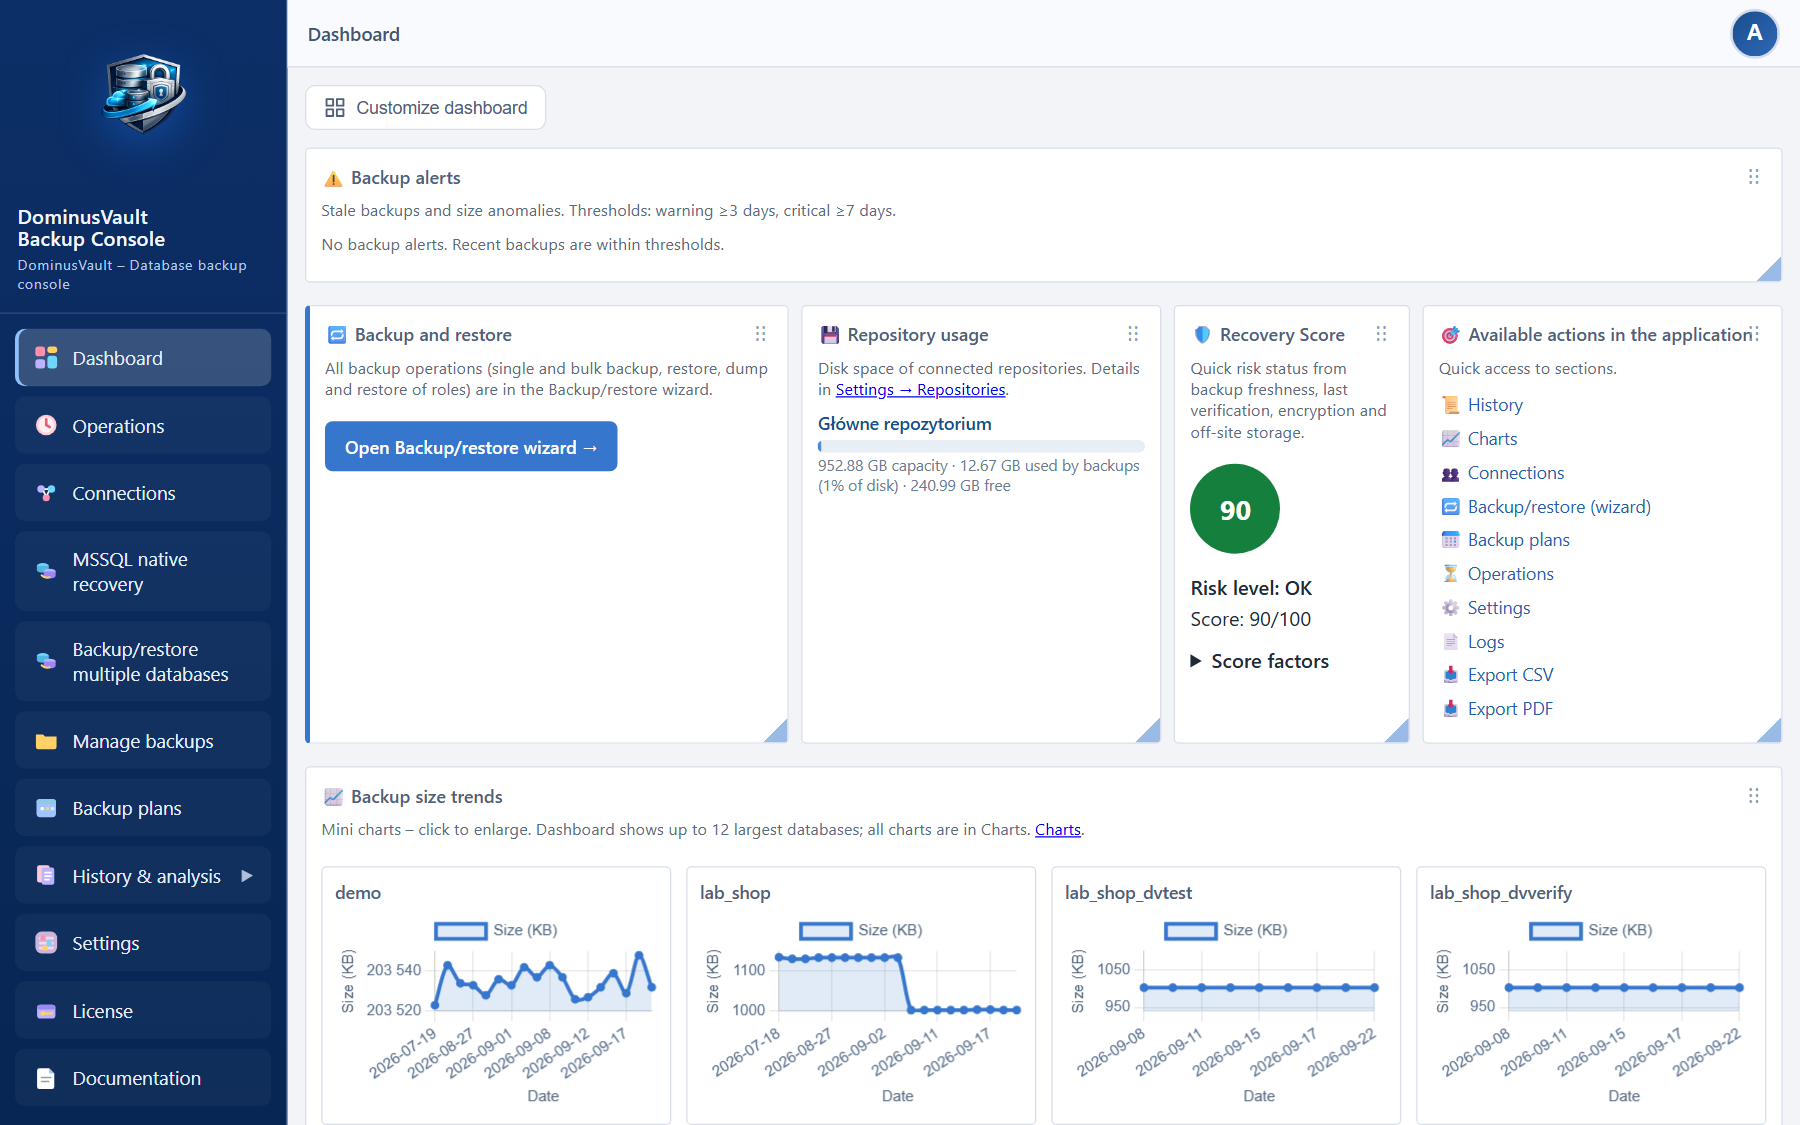
A guide for IT administrators. It covers the initial configuration, adding database servers and repositories, user accounts, backup plans and day-to-day upkeep of the console.
The sidebar is arranged in this order: Dashboard → Operations → Connections → Backup/restore → Plans → the expandable History & analysis group (History, Reports registry, Charts, Logs) → Settings → License (overview only) → Documentation. You activate license keys in Settings, on the License tab.
After installation, open the panel in your browser. The first time you do, you get the setup wizard (/setup) instead of the login screen. Installation is described first, separately for Windows and Docker, and the wizard steps follow.
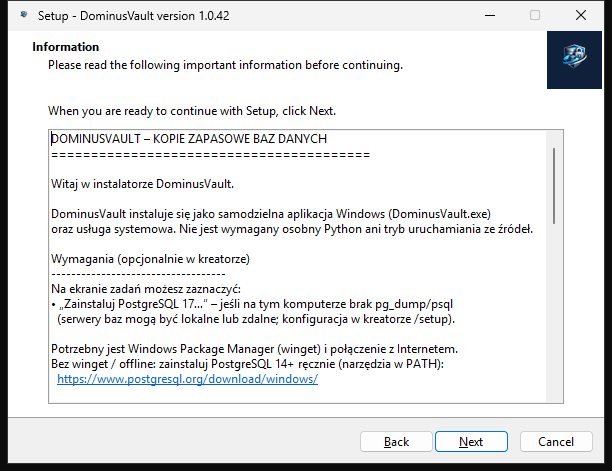
DominusVault-Setup-<version>.exe from the releases page (or DominusVault-Setup-latest.exe).C:\Program Files\DominusVault by default)./setup wizard in your browser.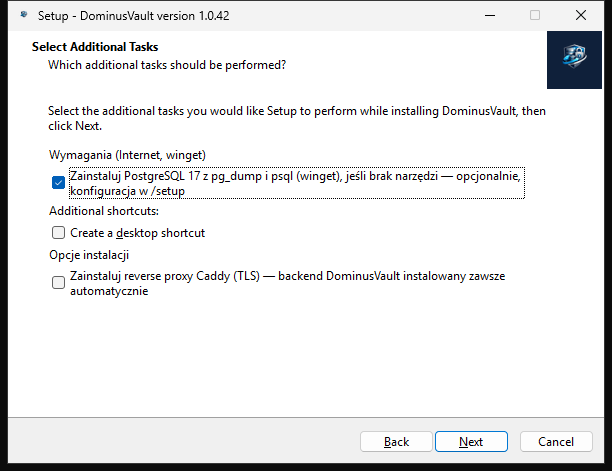
http://127.0.0.1:8444, which is the application itself. With Caddy installed you also get https://…:8445.%ProgramData%\DominusVault folder and the PostgreSQL DominusVault database stay on disk. Remove them by hand if you want a completely clean start.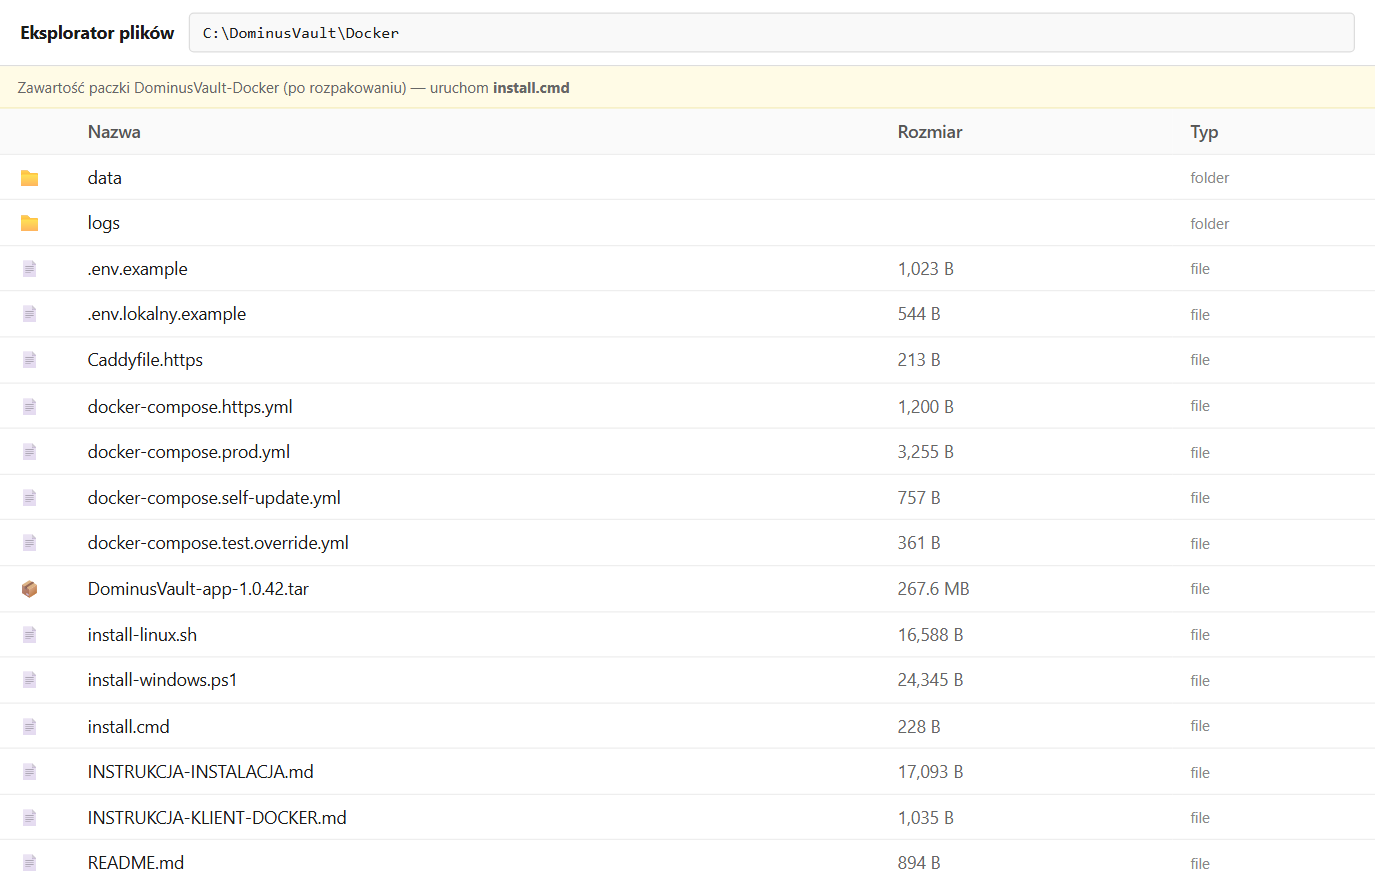
install.cmd or install-linux.sh, the Compose files and the DominusVault-app-….tar image.Download DominusVault-Docker-<version>.zip from www.dominusvault.pl/releases/docker/. The full guide is the INSTRUKCJA-INSTALACJA.md file inside the package. In short:
C:\DominusVault\Docker on Windows and /opt/dominusvault on Linux. Do not pull the installer script out of the package on its own.install.cmd on Windows, or run ./install-linux.sh on Linux. The script loads the image from the tar file, writes .env and starts the containers.http://localhost:8444/setup, or the same address using the host's LAN IP.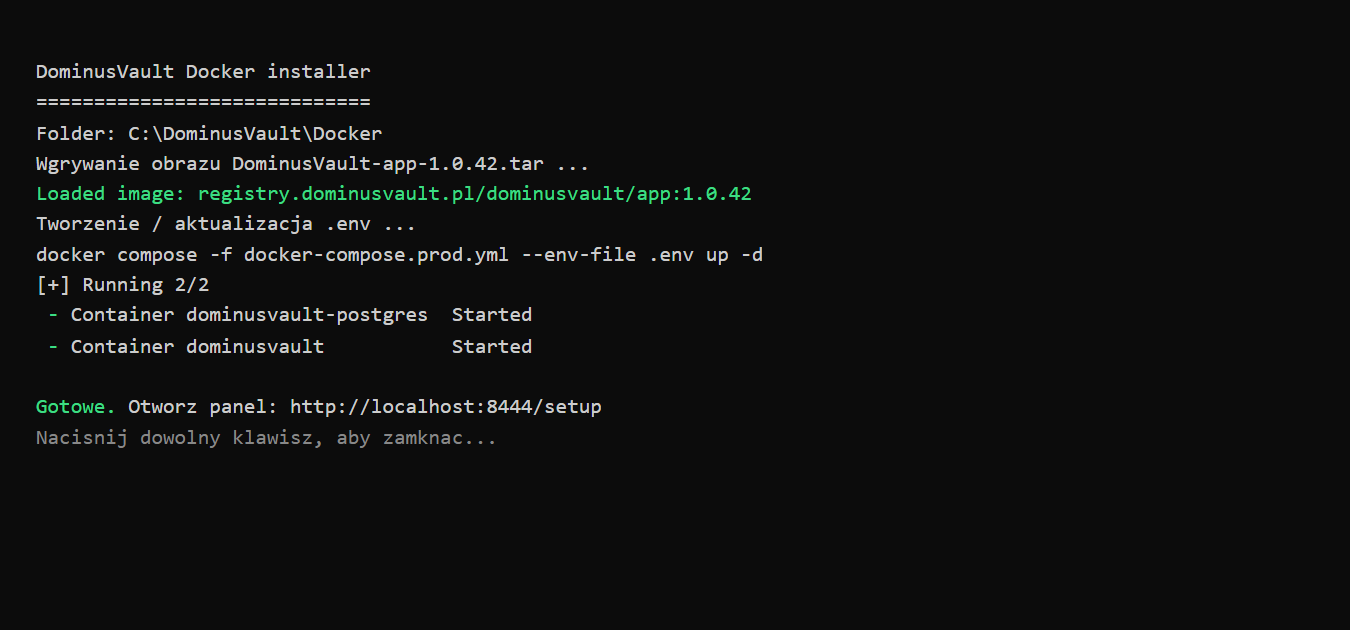
install.cmd run: the script loads the image and brings the containers up with Compose.D:\DominusVault\backup). The installer maps it automatically; Settings shows the same folder as “Backup folder on this computer”.localhost means the container itself. Use host.docker.internal if PostgreSQL runs on the same host, or a LAN IP address reachable from the machine where DominusVault runs./setup)
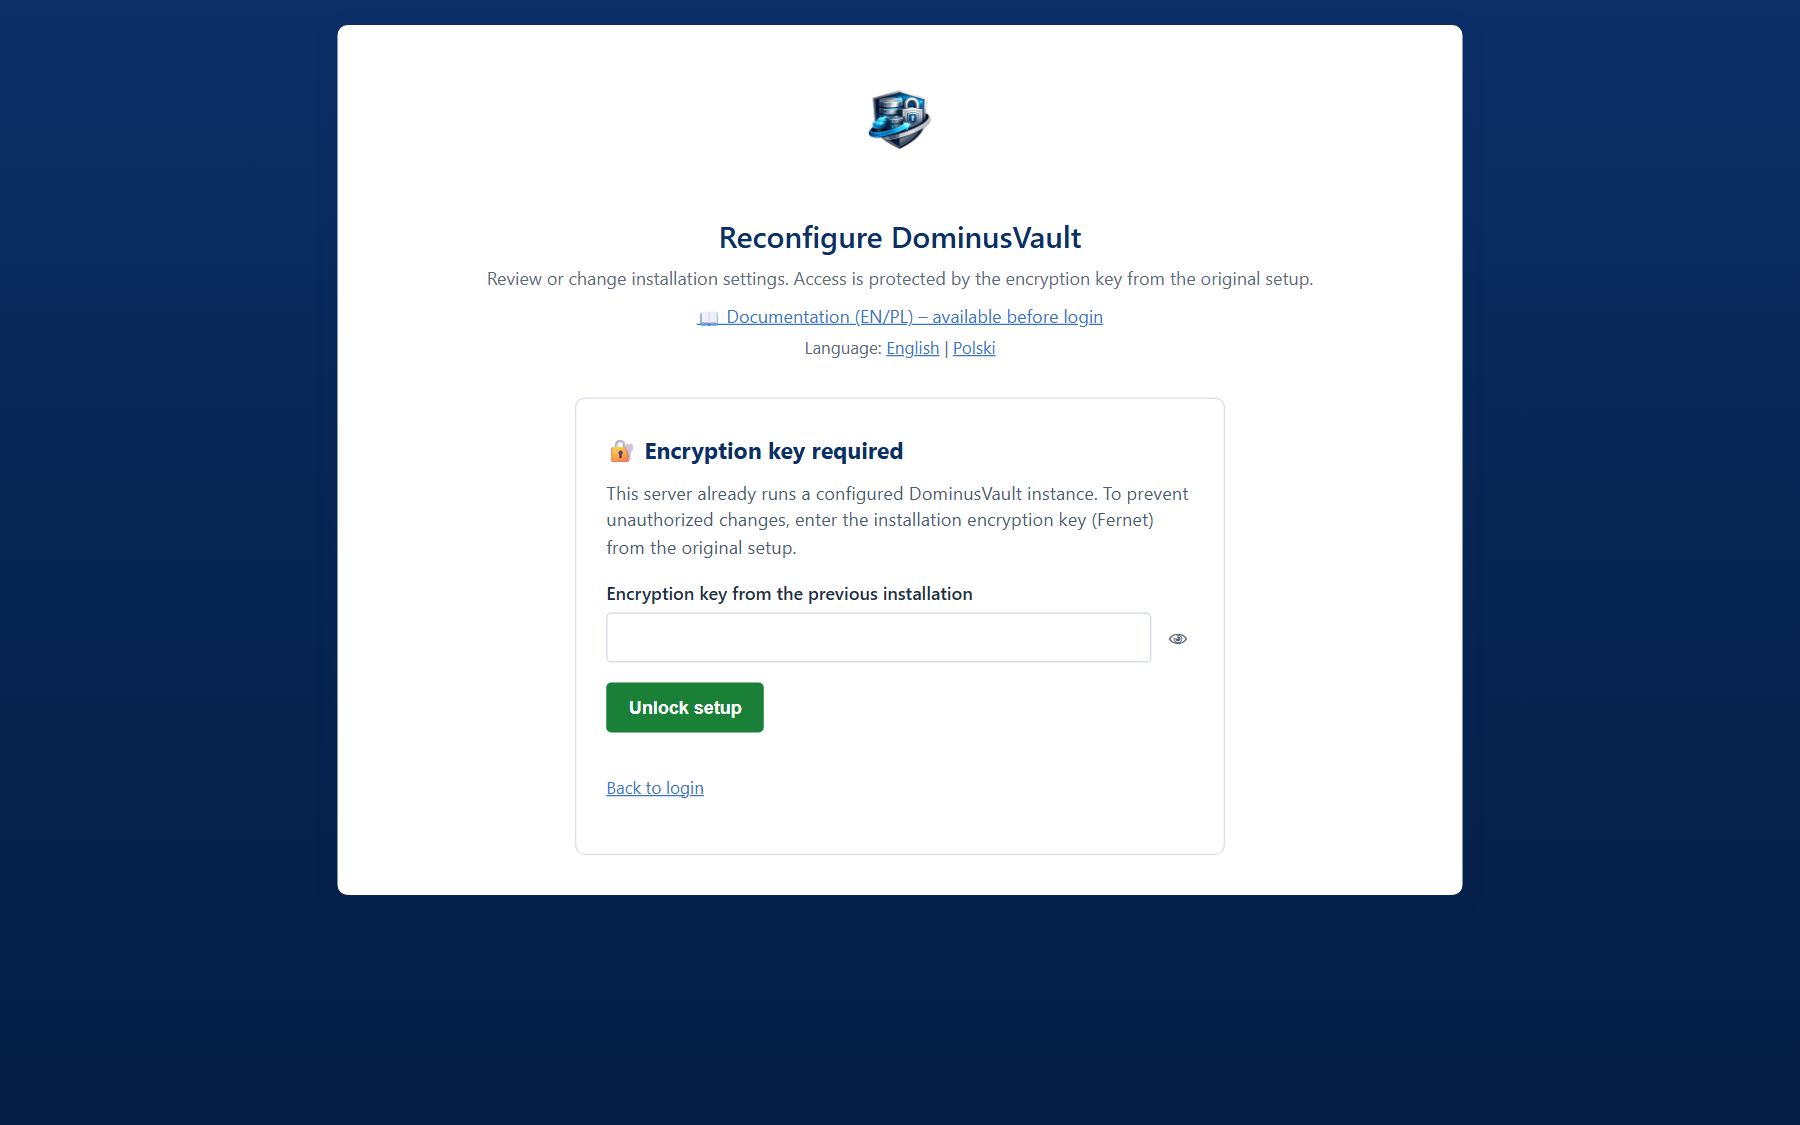
/setup asks for the encryption key from the original setup and then returns you to the login screen. On a first run the wizard walks through the application database, the admin account, the key and the repository.The wizard takes you through these steps:
DominusVault database with settings, accounts and plans. Usually a server you already run, often the very one you back up..dvb archives, so put a copy somewhere safe straight away. In a Docker installation, leave the field empty if the key is already in .env.Passwords and credentials are stored encrypted in the database. Anything you set in the wizard can be changed later under Settings.
The full procedure is in INSTRUKCJA-INSTALACJA.md in the ZIP. In short:
docker compose -f docker-compose.prod.yml --env-file .env down -v. That removes the containers along with the bundled PostgreSQL volume.DROP DATABASE IF EXISTS "DominusVault" there. down -v leaves that database alone..env and the contents of data\, which hold the encryption key and application data. Only wipe the backup folder if you also want to start with an empty repository.install.cmd or install-linux.sh, and go through /setup from the beginning.The easiest way to update is from the panel: Settings → Application updates (see section 17). If you prefer to do it by hand, updating comes down to swapping the application image. Do not use down -v, do not overwrite .env (it holds the encryption key, the PostgreSQL password and the path to the backup folder), and do not run the /setup wizard from scratch.
.env and the data\ directory.install.cmd or install-linux.sh). Answer no when it asks about overwriting .env — that keeps your encryption key and passwords. The script loads the new image from the package for you, without logging in to a registry.The full Docker procedure is described in INSTRUKCJA-INSTALACJA.md from the ZIP package.
Sign in with your existing administrator account. The local repository still points to the backup folder on the server disk (the same one shown in Settings).
If PostgreSQL still holds a DominusVault database from a previous installation, the wizard offers to import the saved settings. Enter the same encryption key you used during the first setup, because without it the program cannot decrypt the passwords held in the database. Once the key is accepted, the panel loads the settings from the database immediately (servers, repositories, plans, mail) and goes to the login screen, so you do not have to click through the remaining wizard steps. Sign in with your existing administrator username and password, and make any further changes, such as SMTP, the repository or the password, under Settings.
/setup)On a server where DominusVault is already configured, the /setup URL is protected by the encryption key from the original installation. Once you enter the key, the settings from the database are applied immediately and you are back at the login screen, exactly as with the import after a reinstall. Change SMTP, the repository or the administrator password after signing in, under Settings.
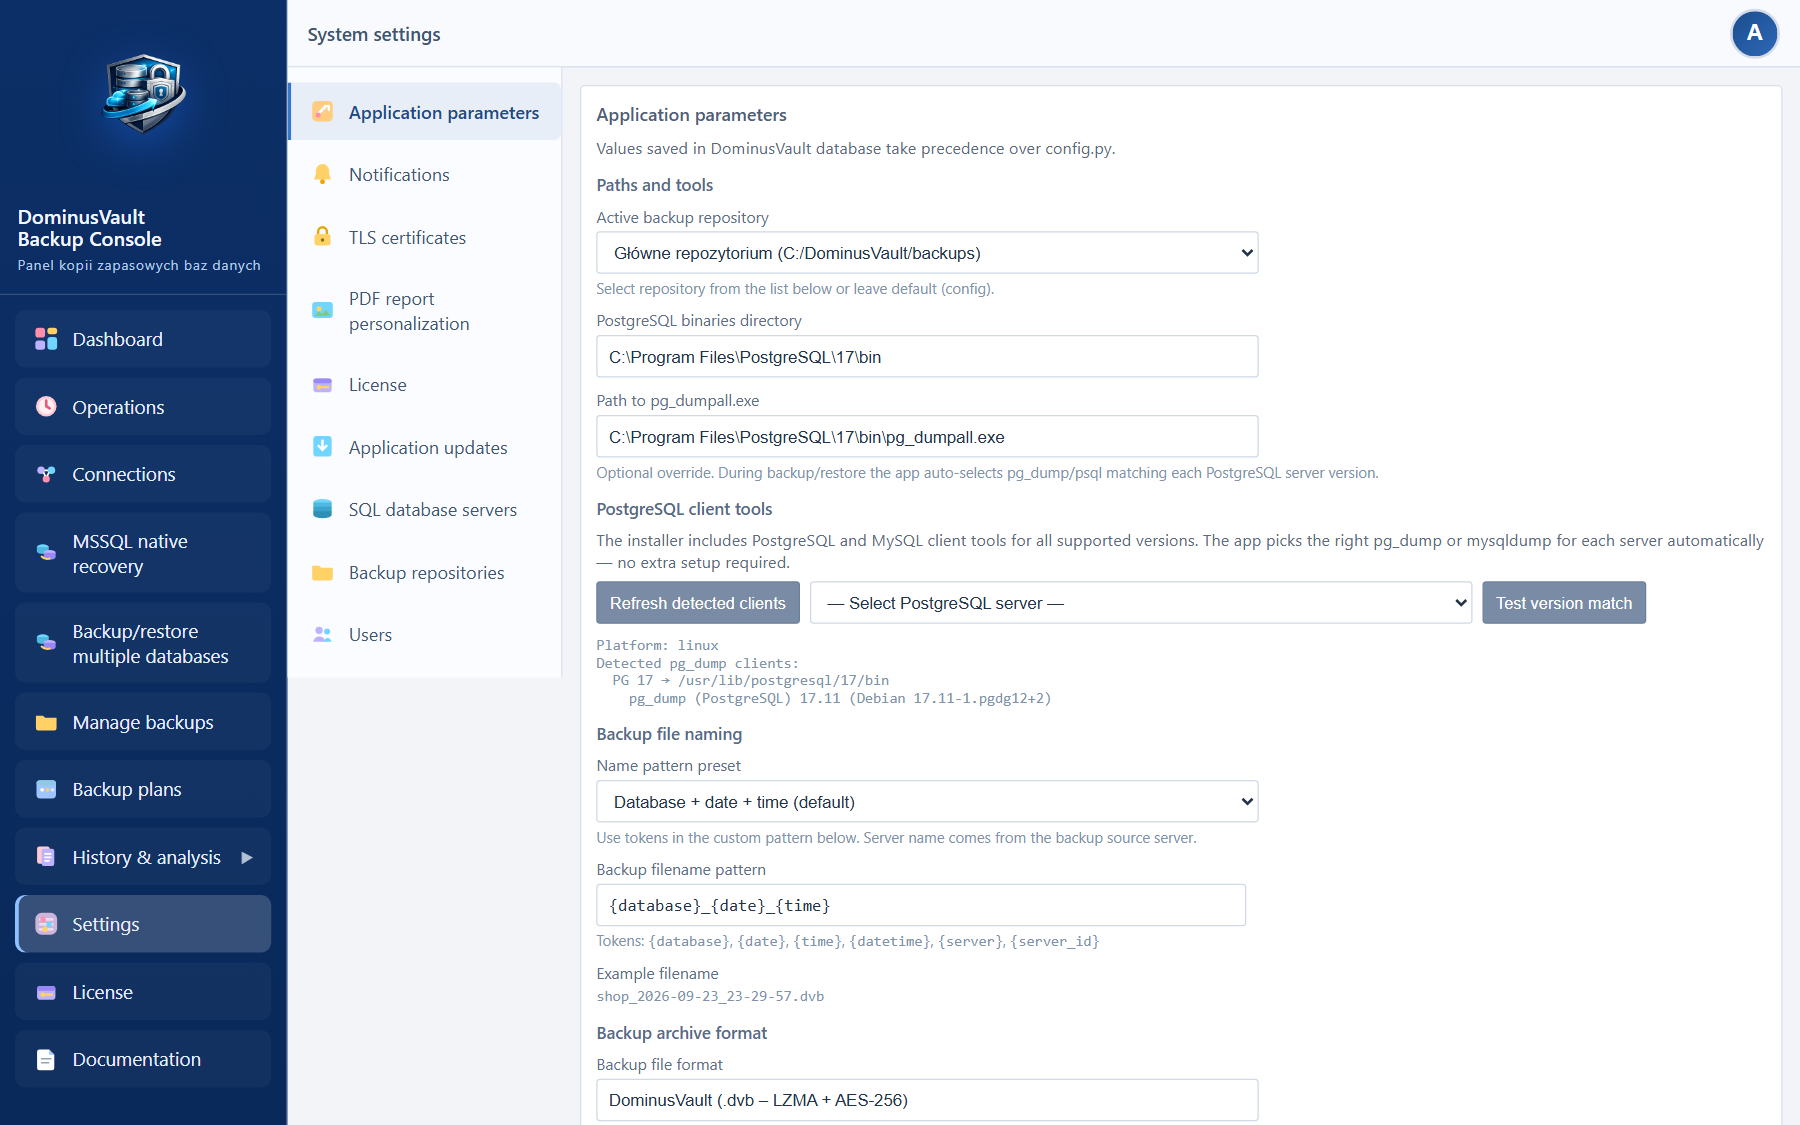
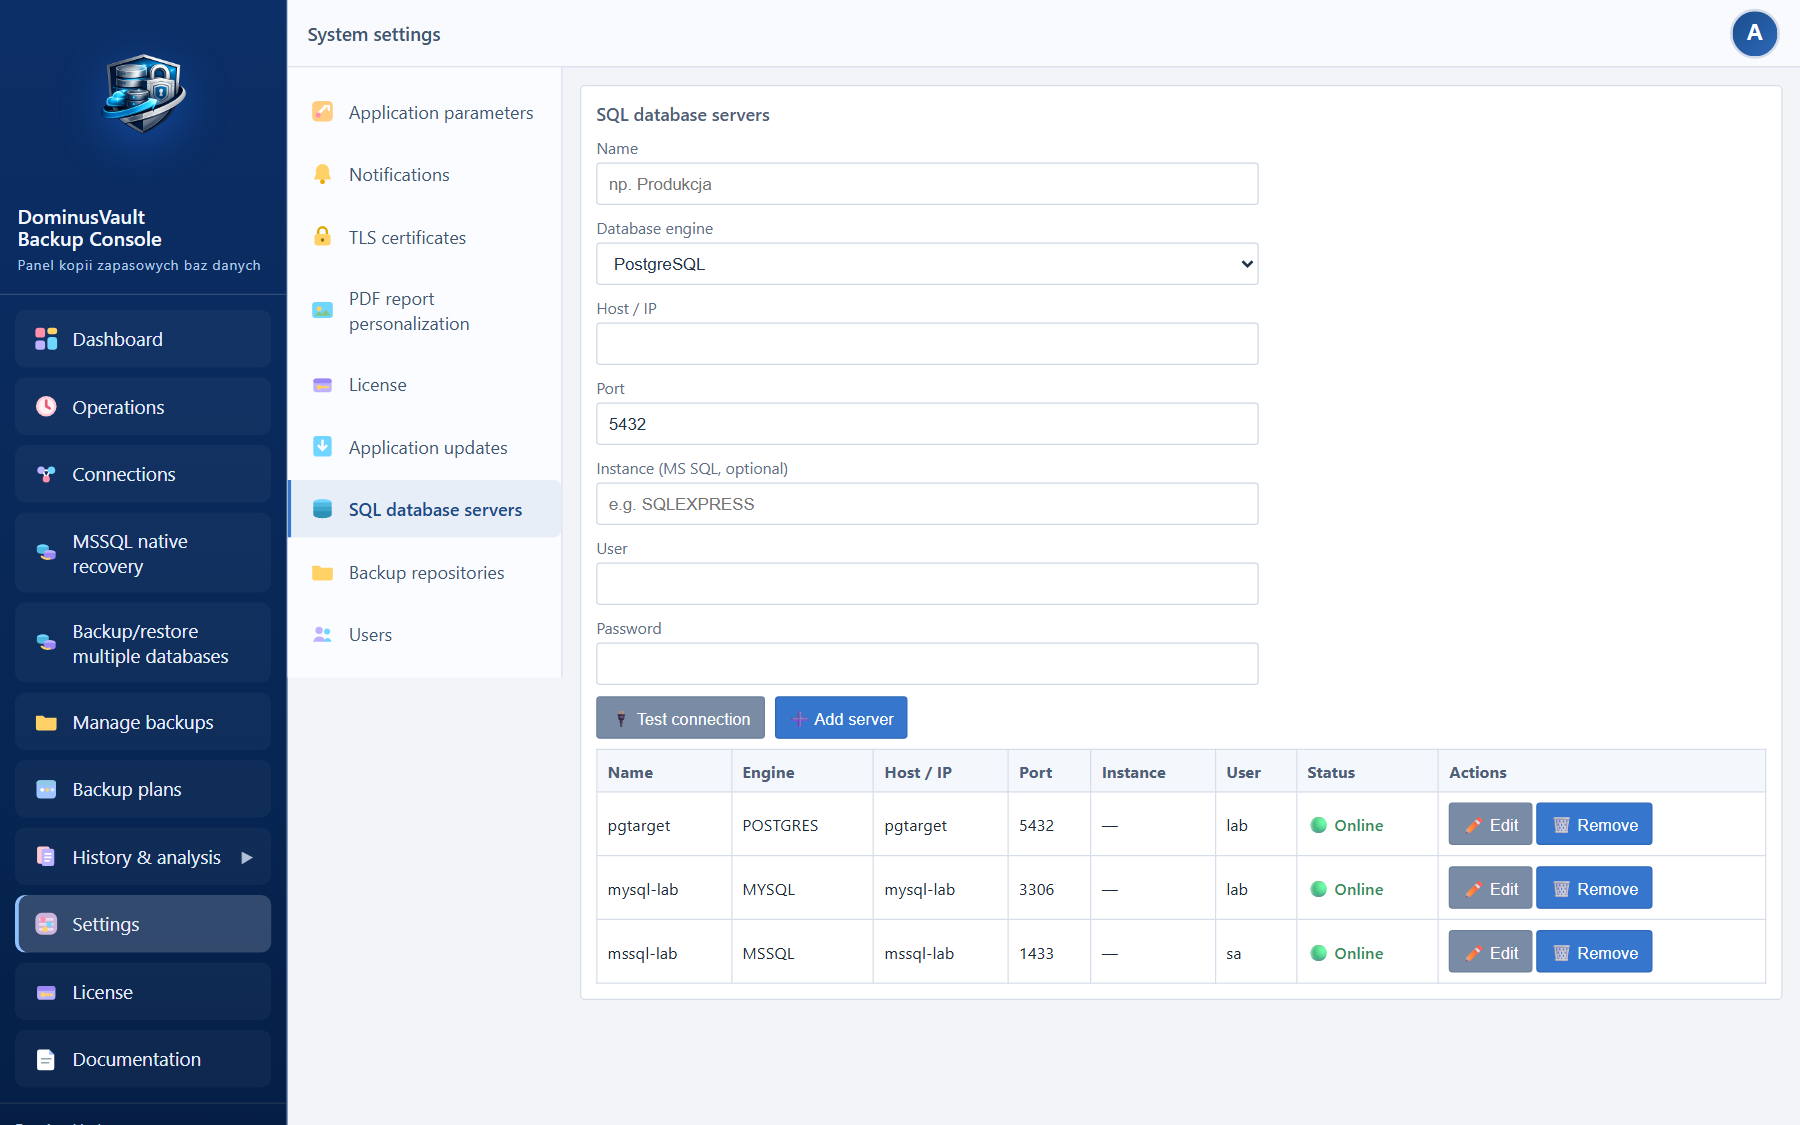
You can add the first server in the setup wizard, although that step is optional. Every further backup source is added under Settings → Servers:
For PostgreSQL the application picks the backup tool that matches the server version by itself. MS SQL backups can be written in the product's own .dvb archive format.
Migration (Backup/restore wizard → Migrate): on Standard you can move a database to another server running the same engine (PG→PG, MySQL→MySQL, MSSQL→MSSQL). Trial and Professional add cross-engine migration in all six directions (PG↔MySQL, PG↔MSSQL, MySQL↔MSSQL, by copying tables directly), with trial staying inside its own slot limits. You pick the source and target servers in the wizard.
Tip: use an address that resolves from the machine or container where DominusVault runs. A name that works from your own workstation does not always resolve the same way for the service.
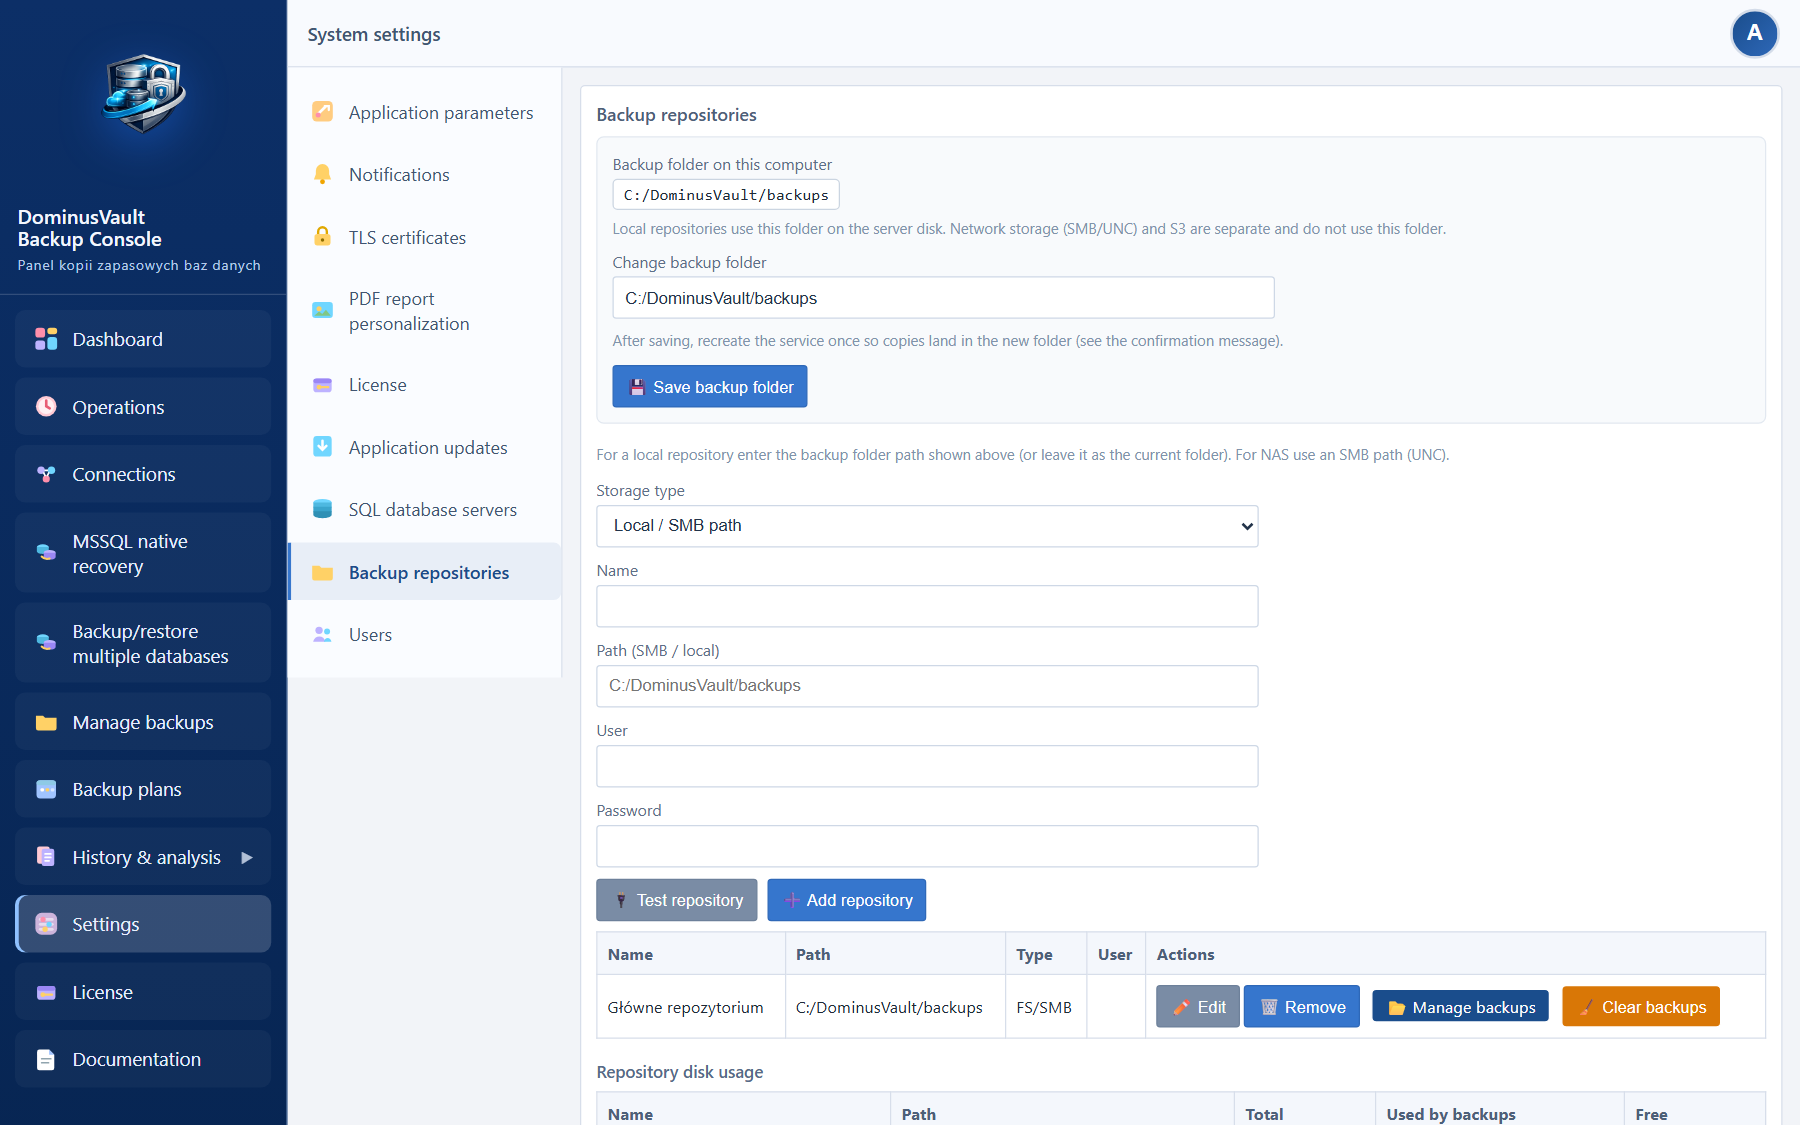
A repository is where backup files end up: a local disk, an SMB share on a NAS, or S3-compatible object storage (MinIO, AWS S3, Cloudflare R2 and similar). Inside it, or under the chosen prefix on S3, the program creates a subfolder for each server and each database. Before your first backup, add at least one repository under Settings → Repositories or in the /setup wizard, and check it with Test access.
D:\Backups\DominusVault, and enter that path in the panel. The account the DominusVault service runs under needs read and write permission on that folder.\\fileserver\backups\dominusvault, plus credentials if the share requires them. The DominusVault server has to be able to reach the NAS over the network.In the panel you see and edit the folder on this computer/server disk (e.g. D:\DominusVault\backup). DominusVault maps it to the local repository for you — you do not need to know any internal container path.
Under Settings → Backup repositories you see Backup folder on this computer. You can change it; after saving, recreate the DominusVault service (installer: docker compose up -d) so new copies physically land in the new place. Until recreate, copies still go to the previous folder.
| Environment | Path in panel | Notes |
|---|---|---|
| Windows + Docker | folder from the installer, e.g. D:\DominusVault\backup |
install-windows.ps1 asks for the folder and writes it to .env |
| Linux + Docker (server) | e.g. /backup/dominusvault |
created by install-linux.sh |
What to check before you start:
chmod 775 on the backup folder is enough, and the install script sets ownership for you.D:\DominusVault\backup) must be writable by Docker..env (DOMINUS_BACKUP_DIR) as described in INSTRUKCJA-INSTALACJA.md — then recreate the service.NAS and SMB shares in Docker: enter a UNC path \\server\share\backups with credentials. That is a separate repository — it does not use the local backup folder block above.
S3 is file storage reached over the network, either a "disk in the cloud" or MinIO on your own server. You do not need an Amazon account; any endpoint that speaks the S3 API will do. Under Settings → Repositories set the storage type to S3-compatible (MinIO / AWS / R2). Below is the same form with each field explained.
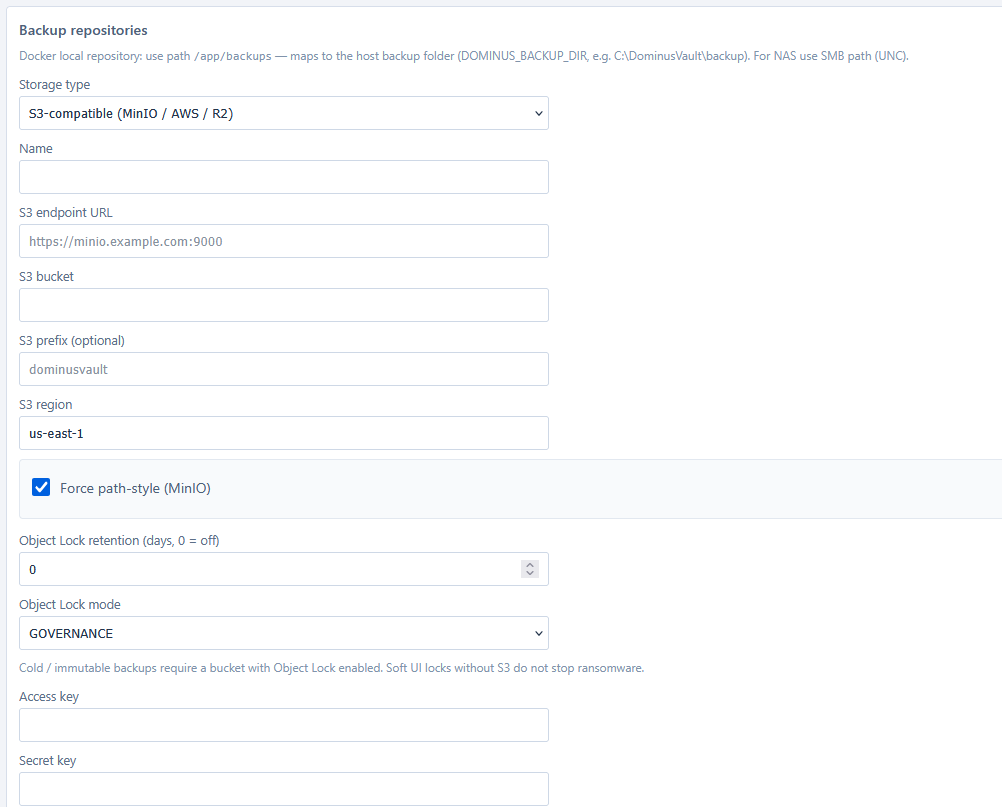
| Field in the UI | What it is | What to enter |
|---|---|---|
| Storage type | The kind of backup destination. | Choose S3-compatible (MinIO / AWS / R2) rather than local disk or SMB. |
| Name | A label used only inside DominusVault, on the repository list and in plans. | Something like Cold MinIO or R2 off-site. It does not have to match the bucket name. |
| S3 endpoint URL | The address of the storage API, which is not always the provider's web console. | Use HTTPS and no trailing slash. For MinIO, something like https://minio.company.local:9000; for Cloudflare R2, the address from the R2 console; for AWS, the regional S3 endpoint from their documentation. |
| S3 bucket | The container that holds the objects. It is not an ordinary folder, and you create it at the provider beforehand. | The exact name of an existing bucket, case included. DominusVault normally does not create the bucket for you. |
| S3 prefix (optional) | A logical subfolder inside the bucket, so backups stay apart from other objects. | For example dominusvault or prod/sql. An empty field means the root of the bucket. |
| S3 region | The region name that most S3 clients insist on. | AWS: the bucket's real region, e.g. eu-central-1. MinIO and most self-hosted setups: usually leave us-east-1 unless the vendor says otherwise. R2: normally auto, or the value from the Cloudflare documentation. |
| Force path-style (MinIO) | The addressing style. The bucket goes into the URL path (…/bucket/…) instead of a subdomain (bucket.endpoint/…). |
MinIO and most self-hosted setups: tick it. AWS S3: usually leave it clear. If you hit NoSuchBucket, SSL or DNS errors, try toggling this first. |
| Object Lock retention (days) | How many days a freshly written backup stays untouchable on the S3 side, with no way to delete or overwrite it. This is your protection against ransomware and accidental deletion. | 0 turns the lock off, which is a sensible setting while testing. 30 means a 30-day lock. It only works when the bucket has Object Lock enabled at the provider; the field in the panel protects nothing on its own. |
| Object Lock mode | How strict the lock is. | GOVERNANCE is the default, and an administrator with the right privileges can sometimes override it, depending on the provider. COMPLIANCE is stricter, and not even an administrator can delete a file before its date. Start with GOVERNANCE, or with retention 0. |
| Access key | The public API identifier, the S3 equivalent of a username. | The key from the MinIO console, from AWS IAM, or an R2 API token. It is not your DominusVault panel login. |
| Secret key | The secret API password, kept encrypted in the application database. | Paste it once when you add the repository. Never send it by e-mail or in a screenshot. |
dominusvault, the region as above, path-style depending on MinIO or AWS, and Object Lock retention 0. Then Save and Test access. Only once the test passes should you enable Object Lock on the bucket at the provider and set the retention days.
Before your first backup to S3, check that:
.dvb archives and native MS SQL copies (.bak / .diff / .trn / .dvenc). The list shows name, type, size and date; you can filter by type (FULL/DIFF/LOG/logical), by date/time range (From–To), search, group by day and page through results. FULL/DIFF/LOG/.dvb groups can be collapsed and expanded (DIFF and LOG start collapsed). You can delete the ones you choose. The link under Settings → Repositories opens the same screen with that repository pre-selected..dvb file from another DominusVault installation. You need the encryption key from that installation. You can either store the file in the repository or just decrypt it and download the .sql without saving anything.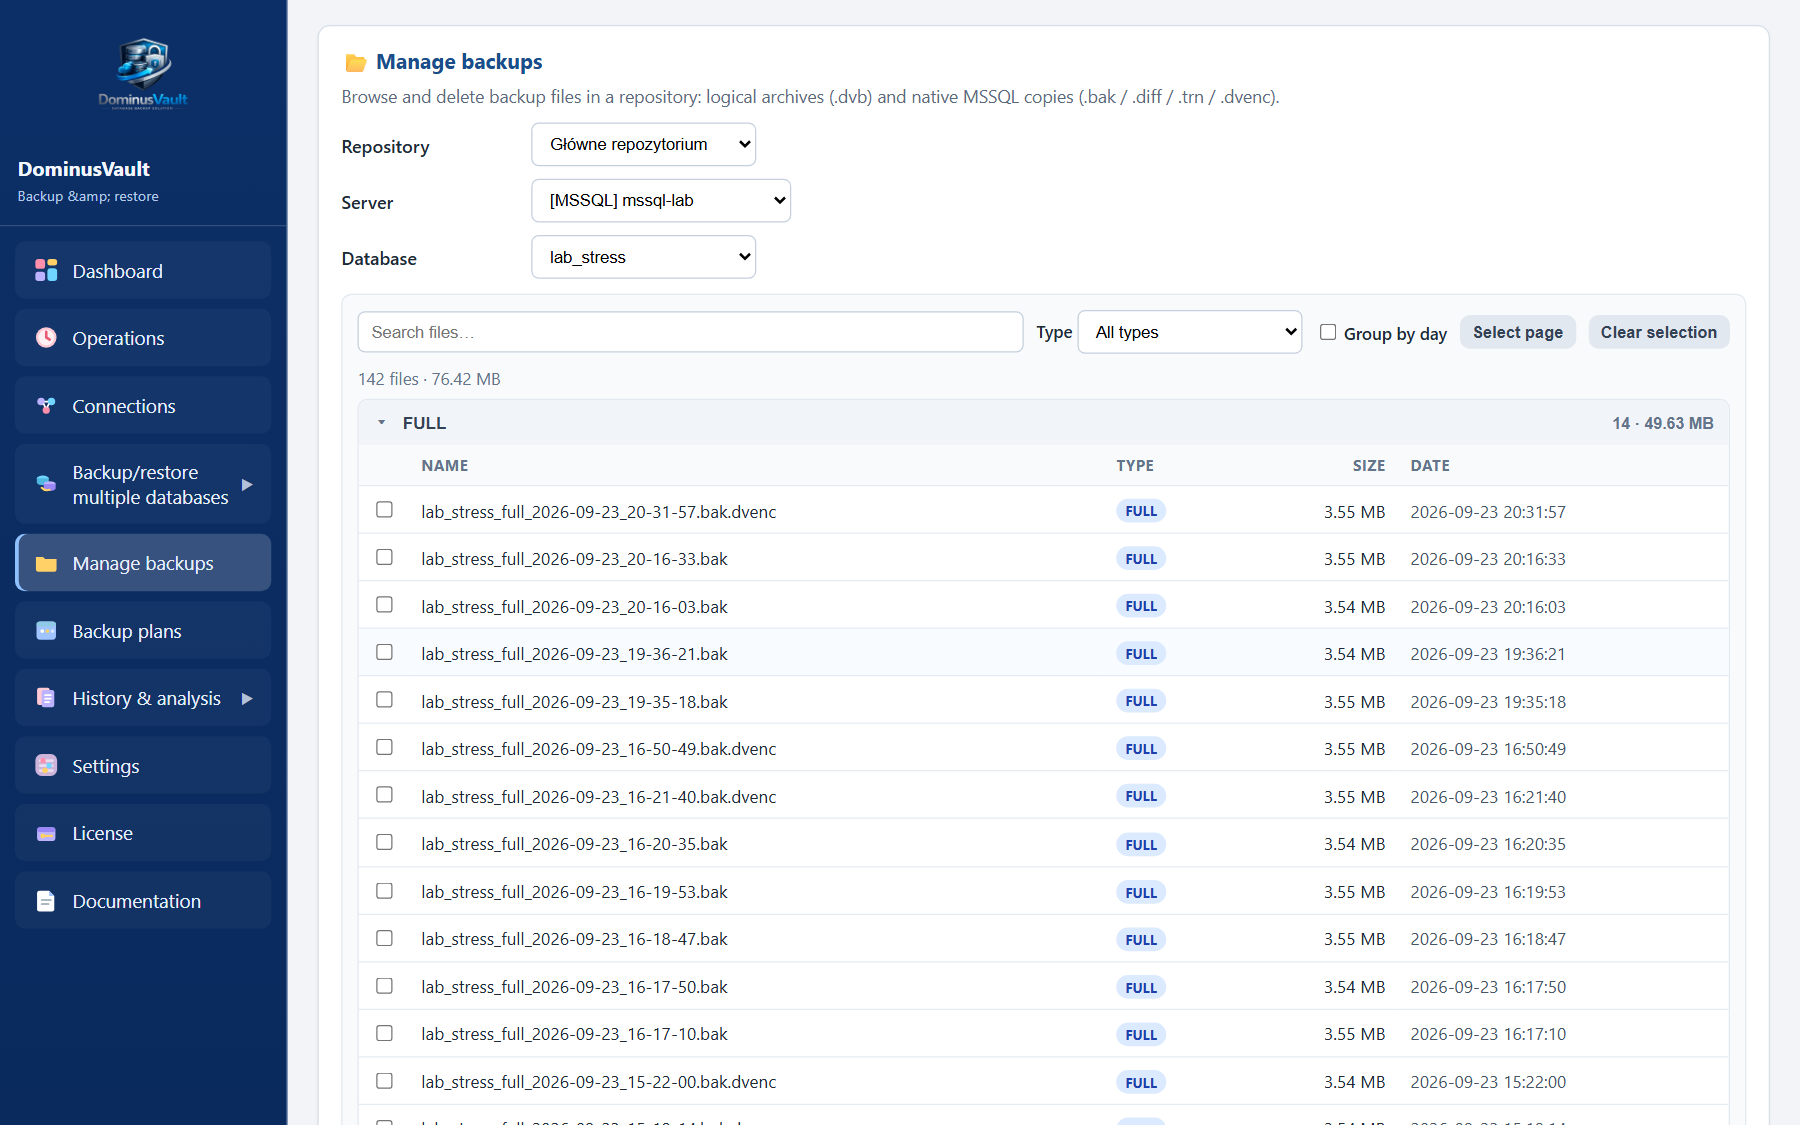
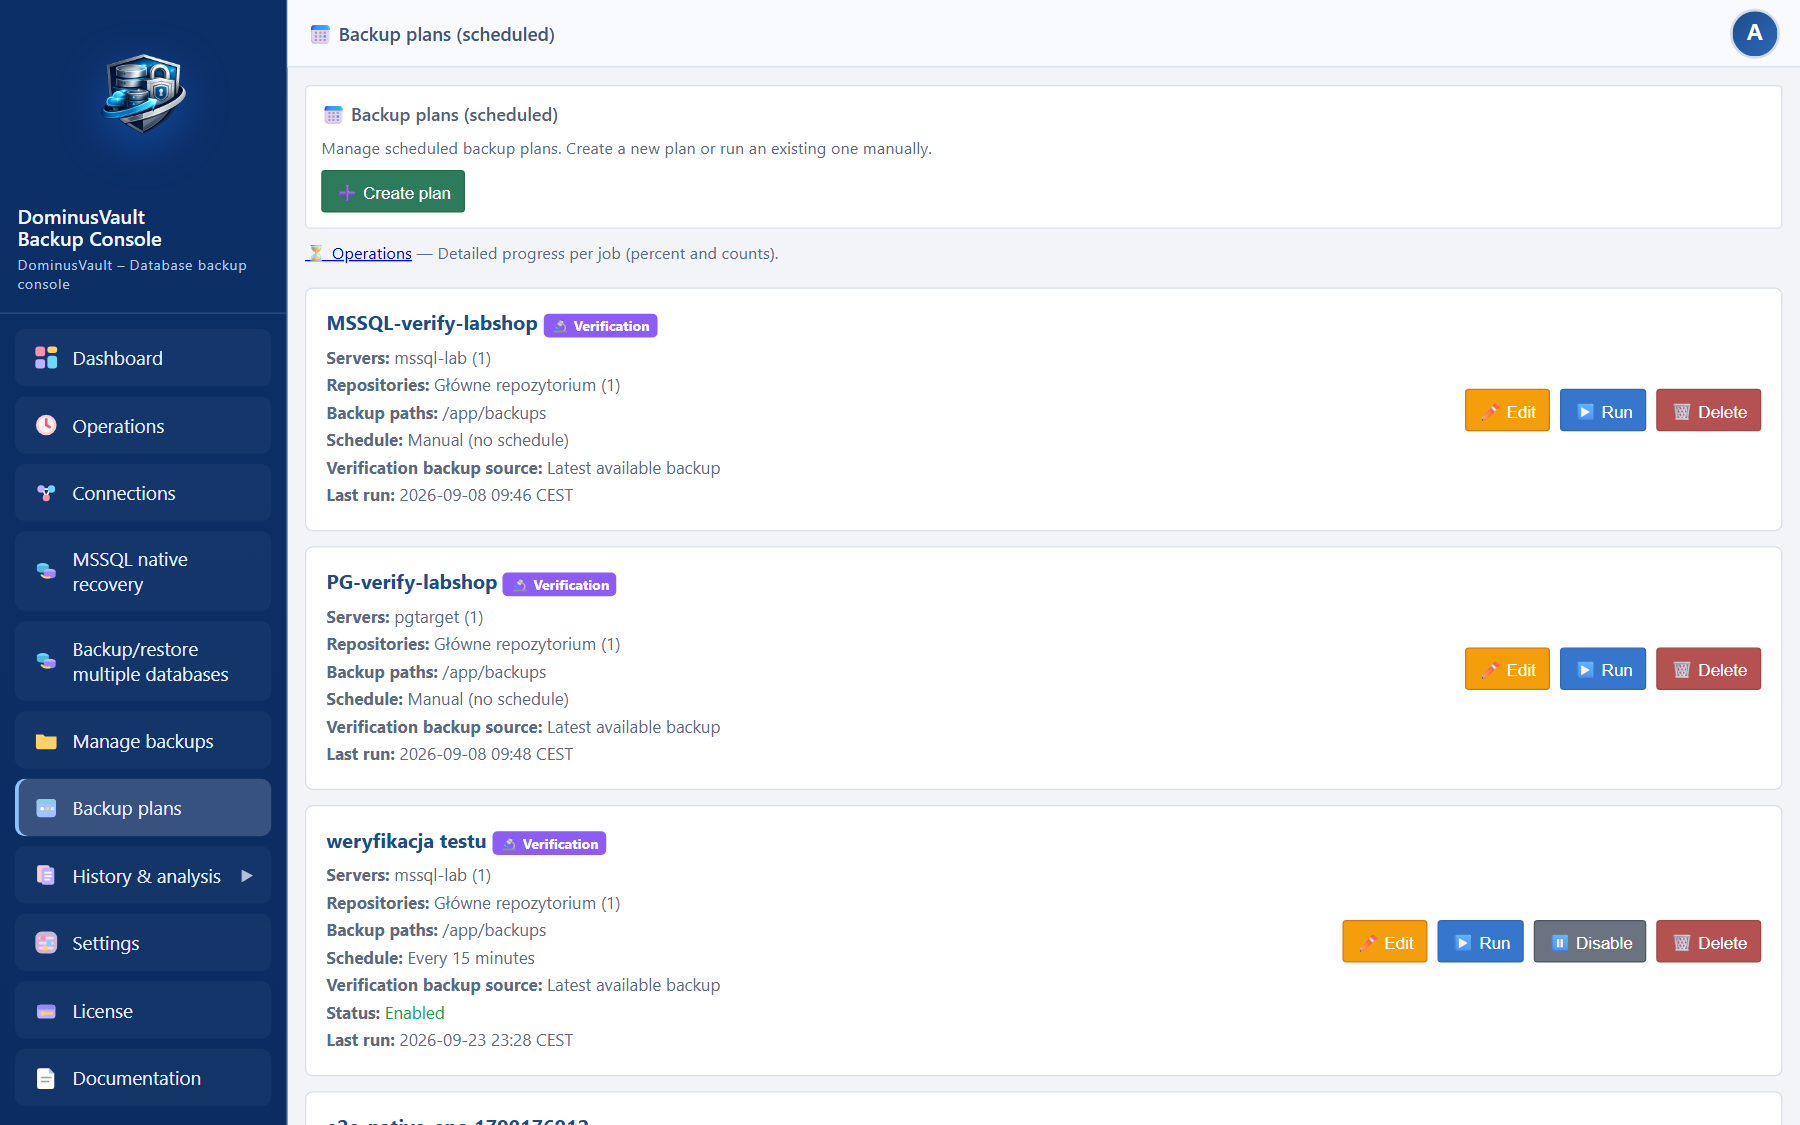
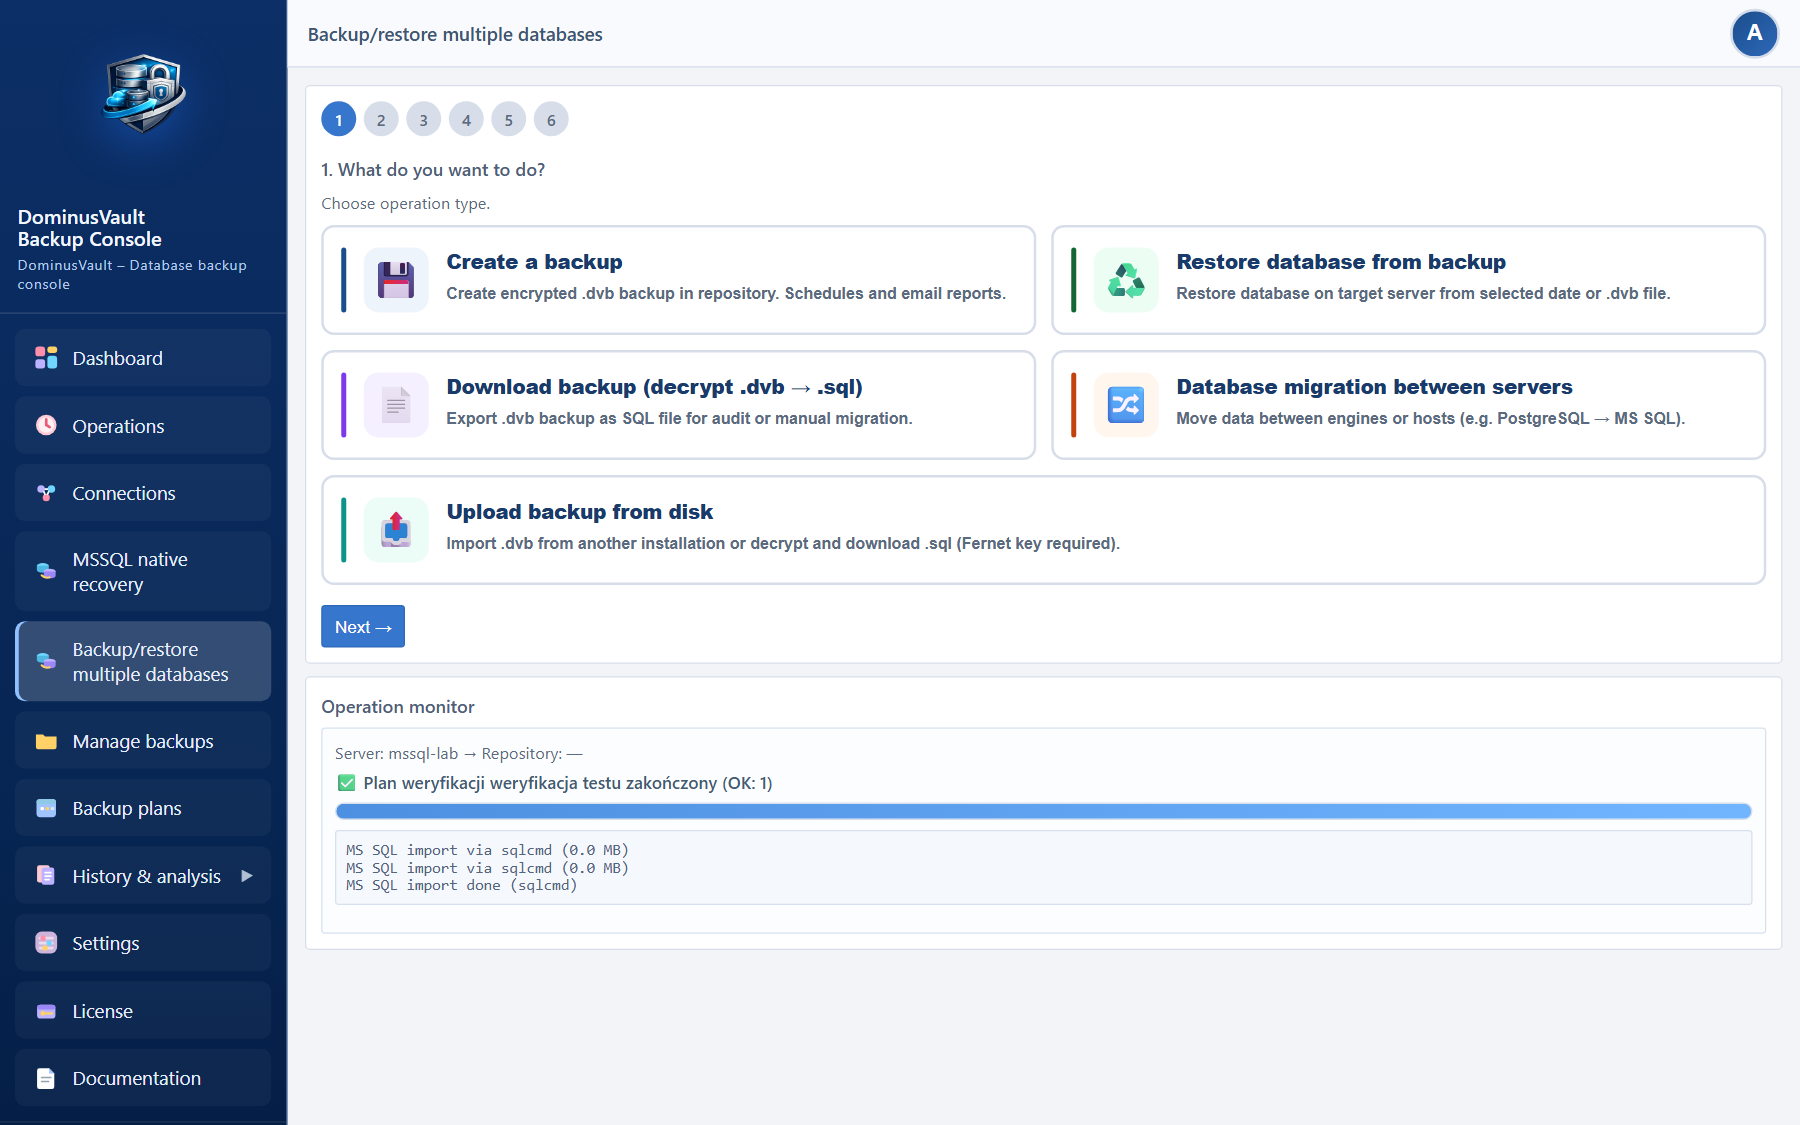
Under Backup plans you define jobs that run on a schedule or on demand. In a plan you set:
.dvb archive, or native SQL Server. With native, the wizard builds a backup policy: one plan with separate schedules for FULL, optional differential (DIFF), and transaction-log (LOG) for point-in-time recovery (.bak / .diff / .trn). DIFF/LOG soft-skip until a FULL exists. You can also encrypt the native file at rest (.dvenc, same key as .dvb). LOG backups require the database recovery model to be Full.Important — native scope: the native engine (FULL / DIFF / LOG, point-in-time recovery with STOPAT, every-N-minutes schedules for LOG, and verification against a native chain) is currently available for MS SQL databases only. PostgreSQL and MySQL still use logical .dvb backups; native equivalents for those engines are planned later.
Editing a plan opens a panel on the right. You can jump straight to the section you need, the schedule for instance, without walking through the whole wizard again.
Running a plan:
Progress and history: both appear on the plan list, as a percentage bar and a database counter, and on the Operations page. Each run is its own row. You can cancel a single job, a selected group, or all of them at once.
A recommendation: point the plan at an explicit list of production databases rather than at "all databases". That way you avoid copying temporary databases, such as those with a _test suffix.
Verification (test restore) can also use the native engine (MS SQL only): the plan does not create a new backup; it restores the FULL→DIFF→LOG chain (.bak / .diff / .trn, including .dvenc) onto a test database — optionally with STOPAT when you pick a specific point in time. The test target must be MS SQL and must see the same backup files (a shared native backup folder on the SQL server).
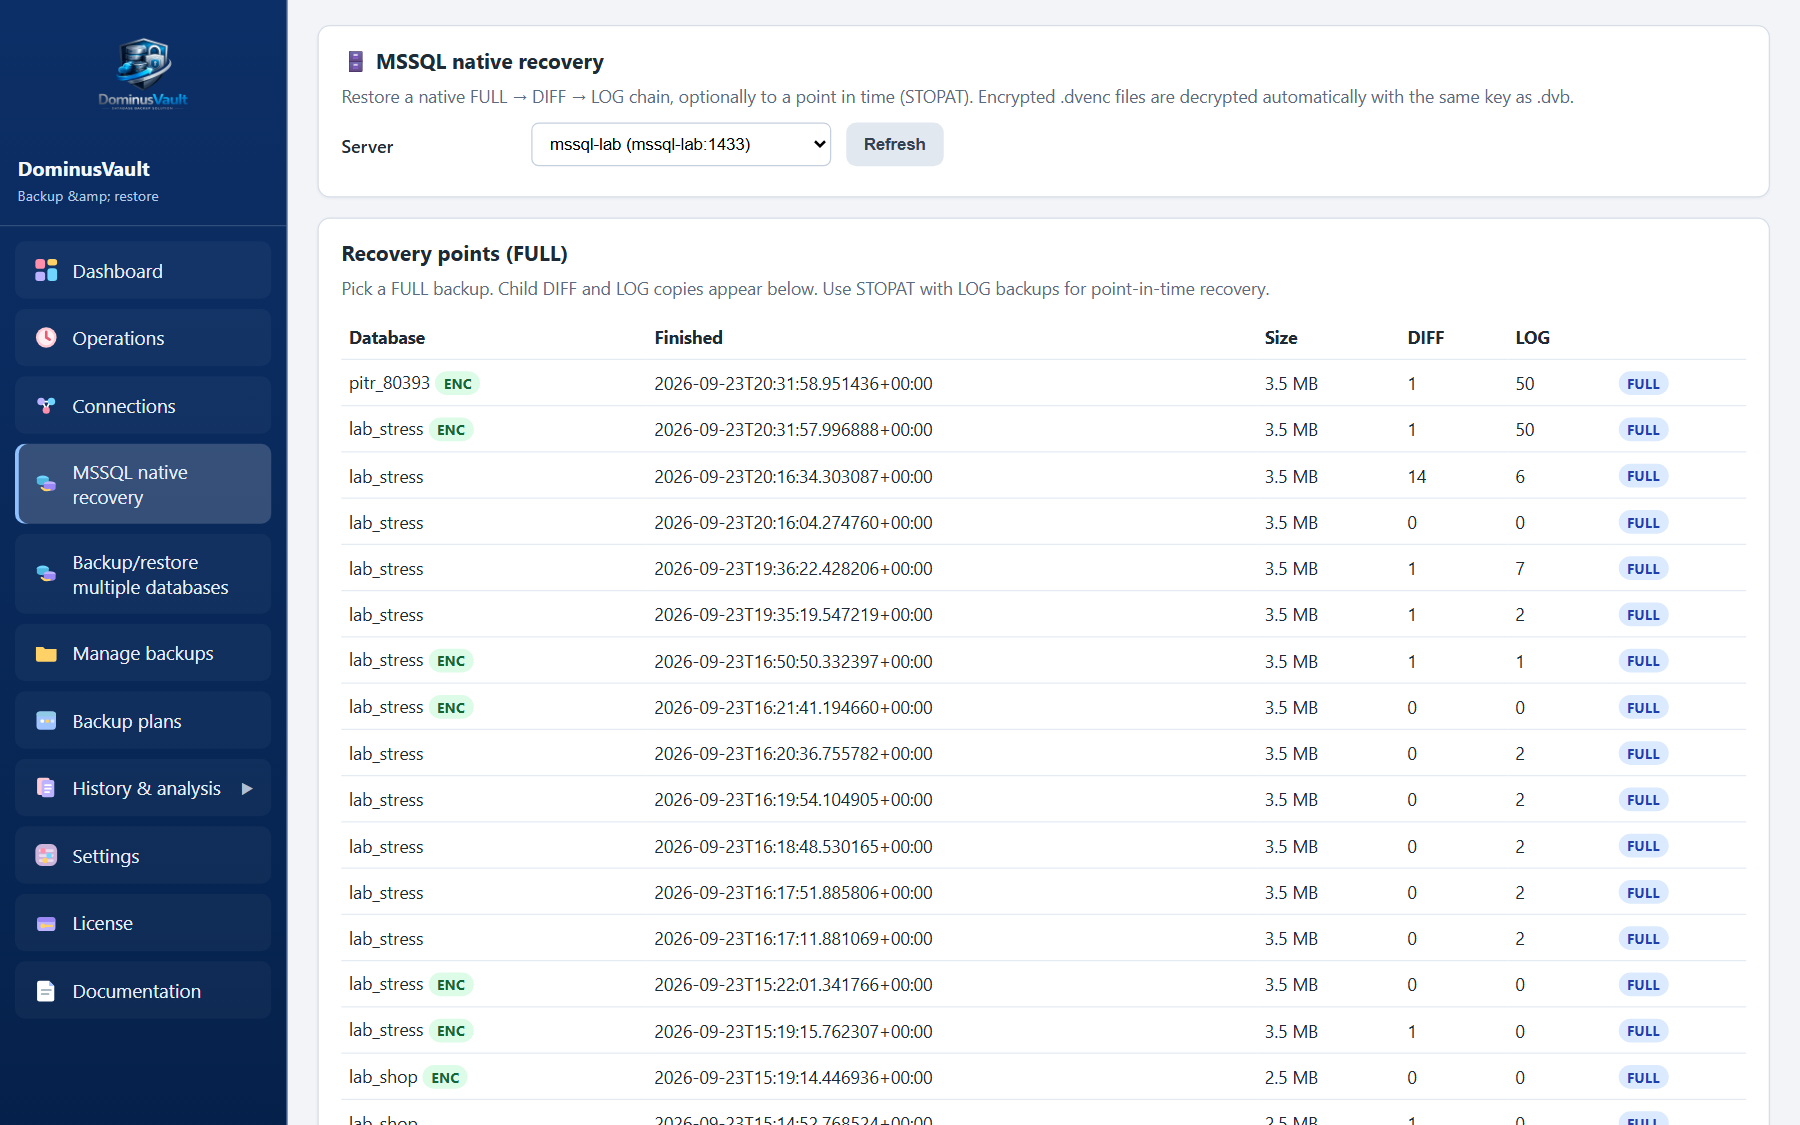
This path is MS SQL only (Professional / Enterprise; lab). When a plan stores native backups — FULL (.bak), DIFF (.diff), LOG (.trn) — open Backup/restore multiple databases → MSSQL native recovery, pick a FULL point, optional DIFF and LOG files and a target database name. Unchecking a LOG automatically clears newer LOGs (restore stops at the older segment). .dvenc files are decrypted automatically with the same key as .dvb. Restoring under a different name relocates the data files so the source database files are not overwritten.
This is a separate plan mode, and it does not create a new backup. Instead it restores the latest backup, or one you choose, onto a test server and checks that the archive can be decrypted and imported.
Verification works on the Trial, Standard, Professional and Enterprise editions, but not on Free. On the product site customers most often choose Standard, largely for this feature.
_test by default, so the shop database arrives on the server as shop_test.host.docker.internal — localhost would point to the container itself, not the SQL instance on the host.If verification sits there with no progress, stop it with Cancel on the Operations page. Very large databases, the ones measured in gigabytes, need a matching amount of RAM and temp disk space on the DominusVault host; see the performance section for detail.
A .dvb archive is an encrypted, compressed logical backup. Once you decrypt it in the panel, which works on Free as well, you get a plain SQL file for that engine. You can load it with the PostgreSQL, MySQL or SQL Server tools without running DominusVault any longer.
.dvb files.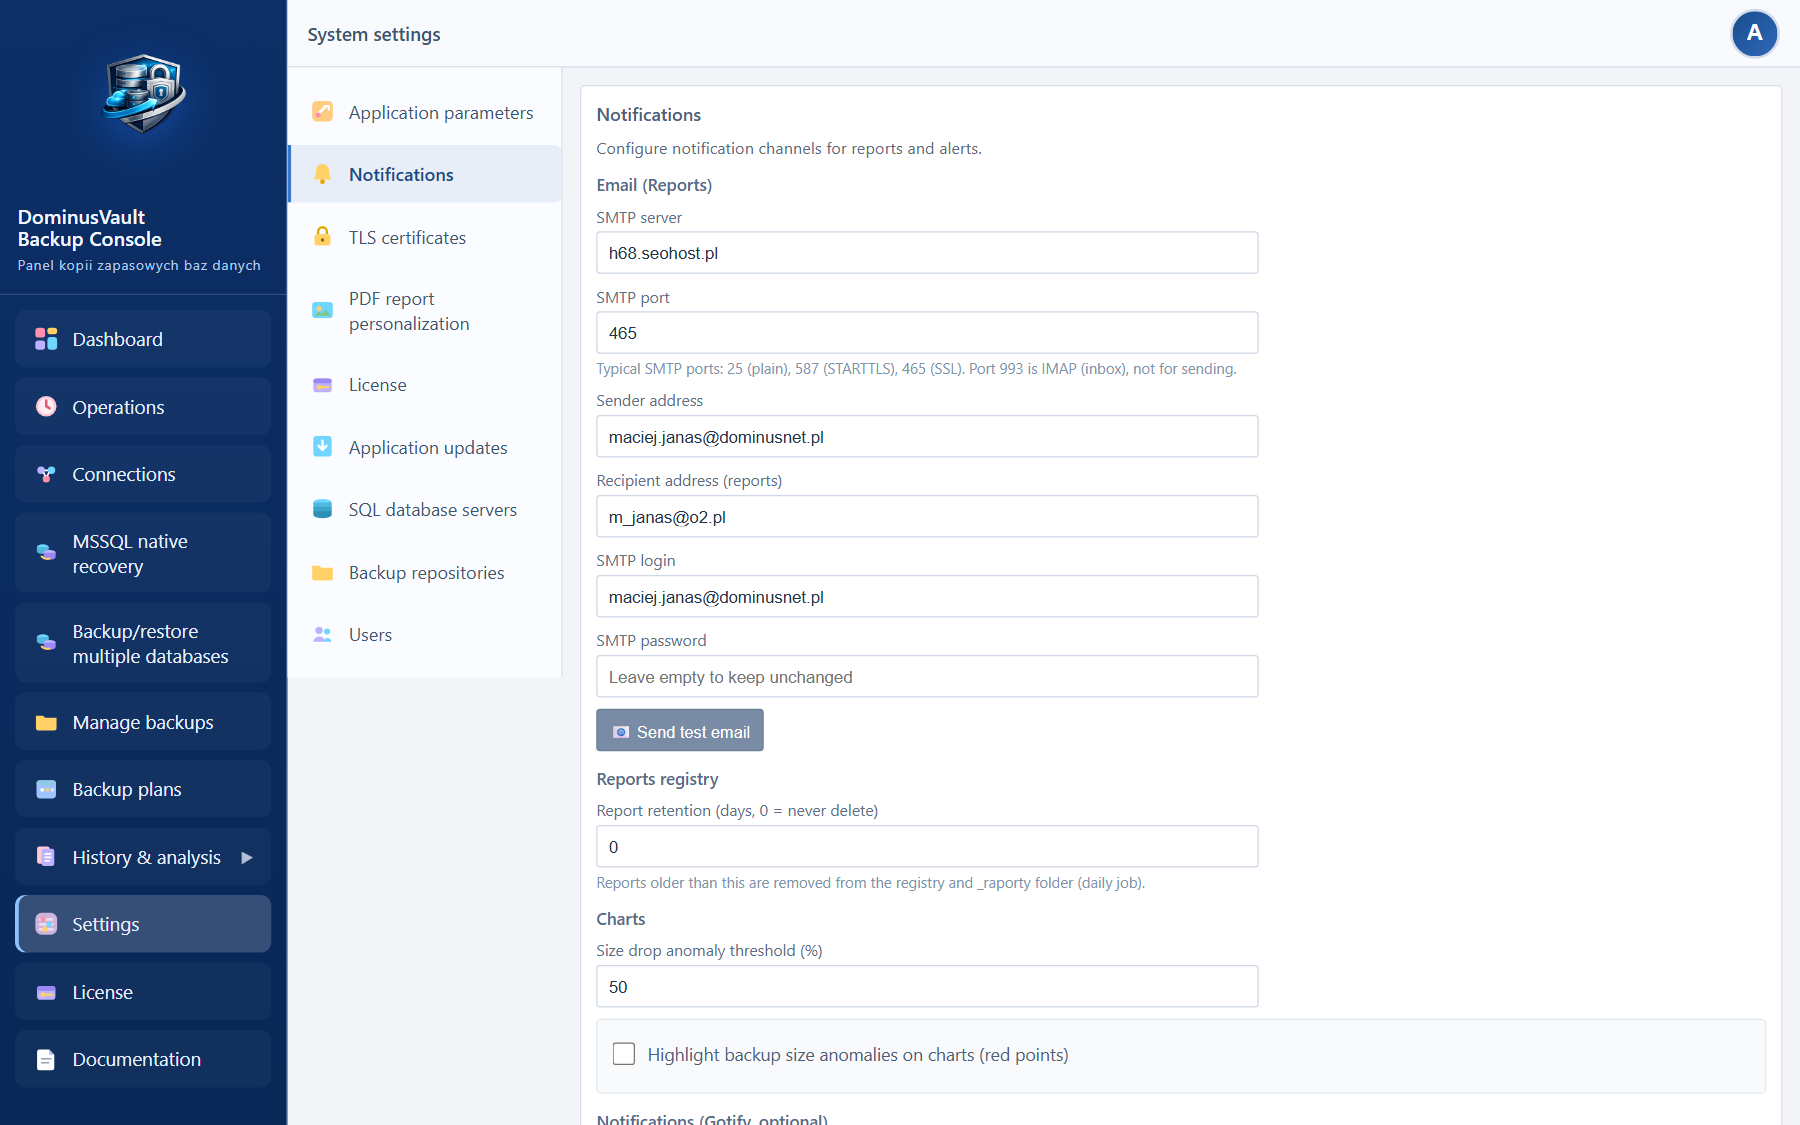
Enter the details of your company mail server: host, port, username and password. Reports go out over SMTP, so port 25 without encryption, 587 with STARTTLS or 465 over SSL. Port 993 is IMAP, the inbox side, and the wizard rejects it. Once saved, send a test message. Backup and restore reports can be attached as CSV and PDF files.
Gotify sends short push notifications to a server of your own. It is handy when you would rather not rely on e-mail alone. Enter the server address, the application token and the priority, then send a test notification.
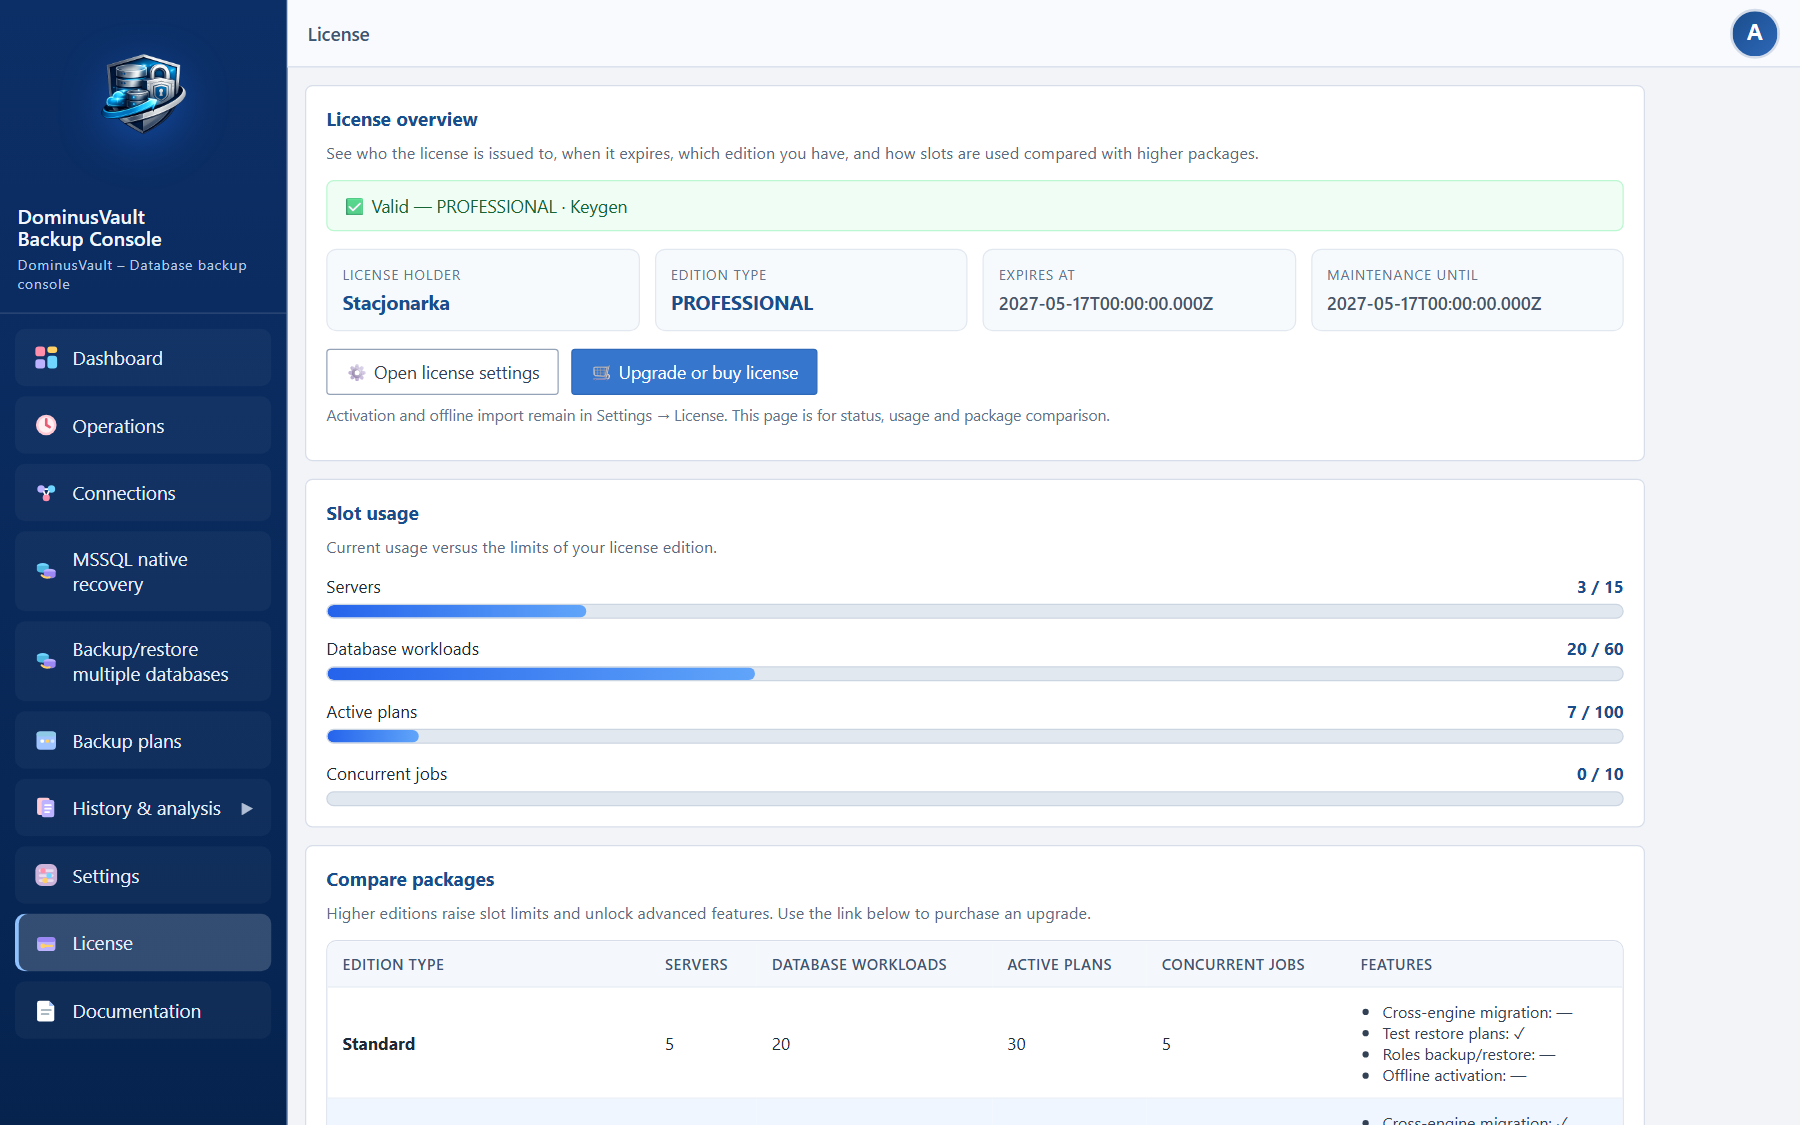
The License item in the sidebar shows the license holder, the edition, the expiry date and slot usage (servers, database workloads, plans, concurrent jobs) against your limits. It also compares your package with the higher ones and links to the purchase or upgrade page.
Activation and offline import are handled under Settings → License:
Without a valid license, some backup operations may be restricted.
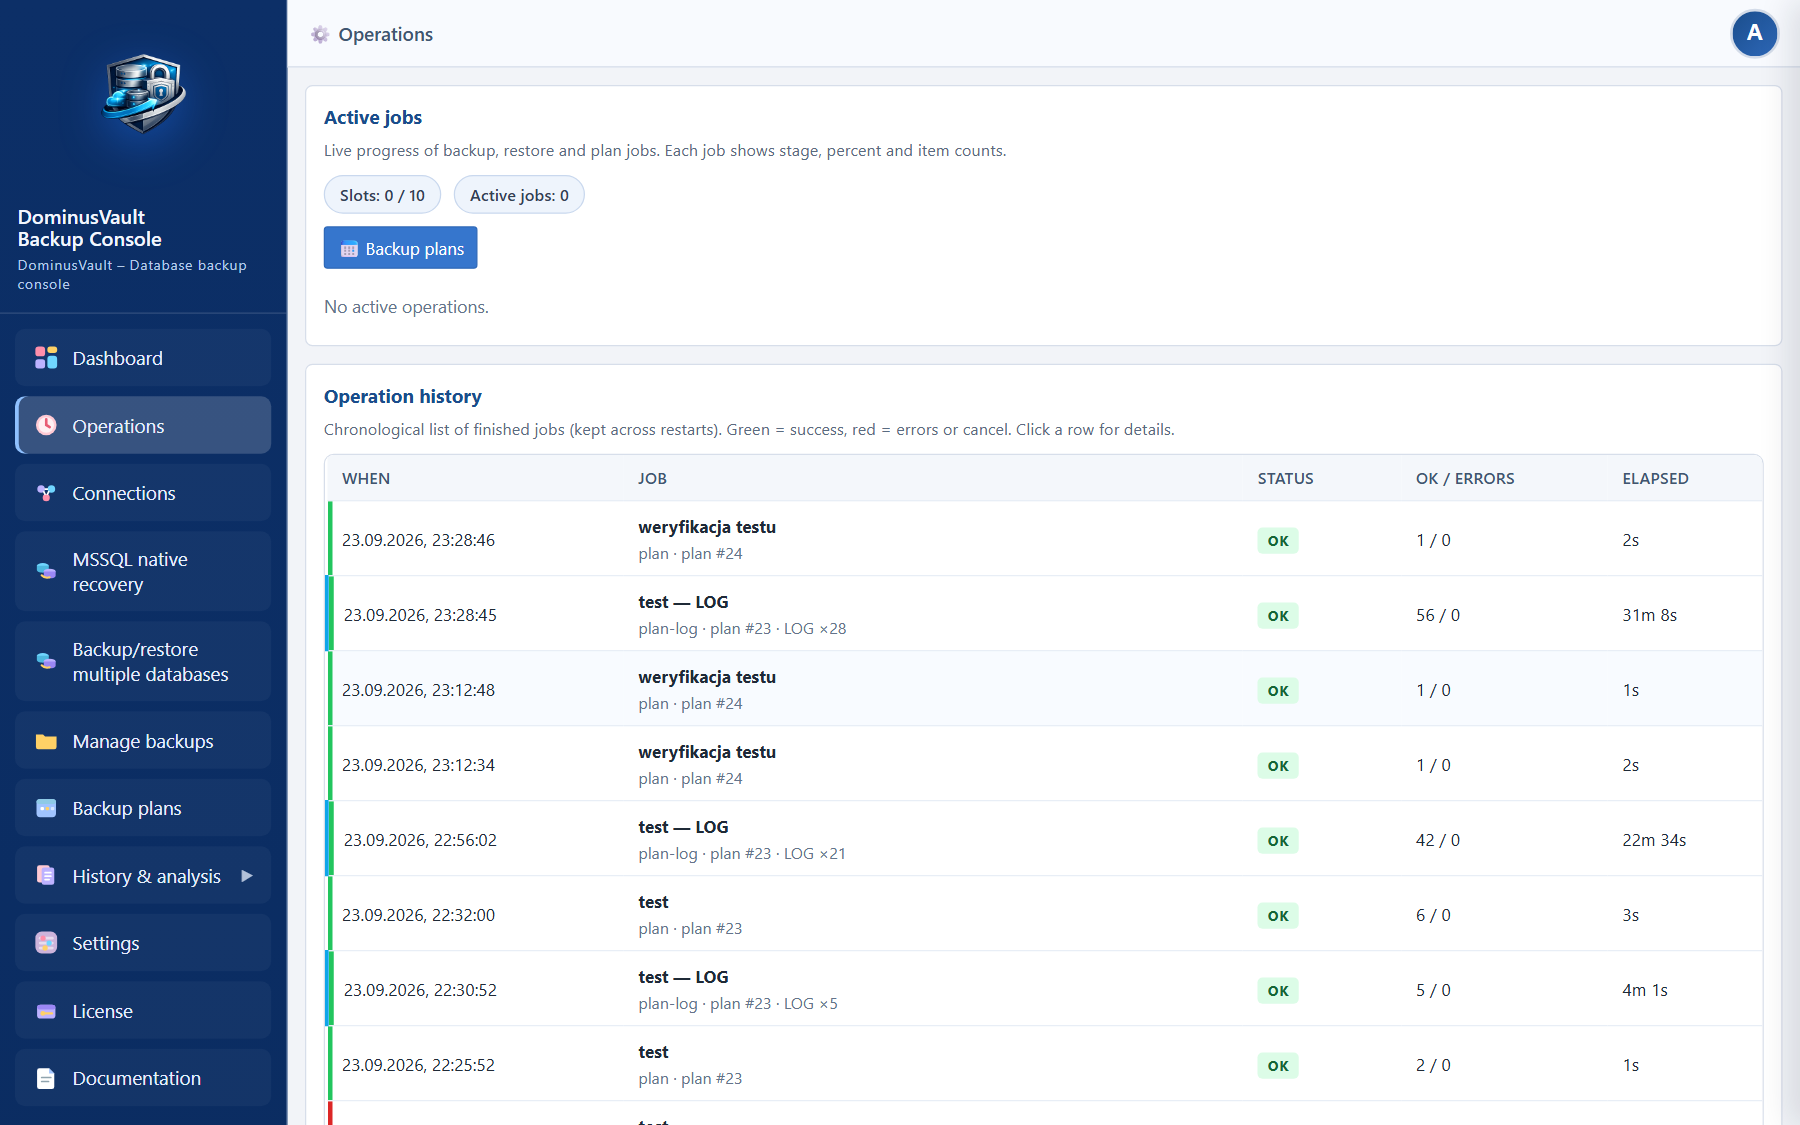
Under History & analysis → Logs you get three views:
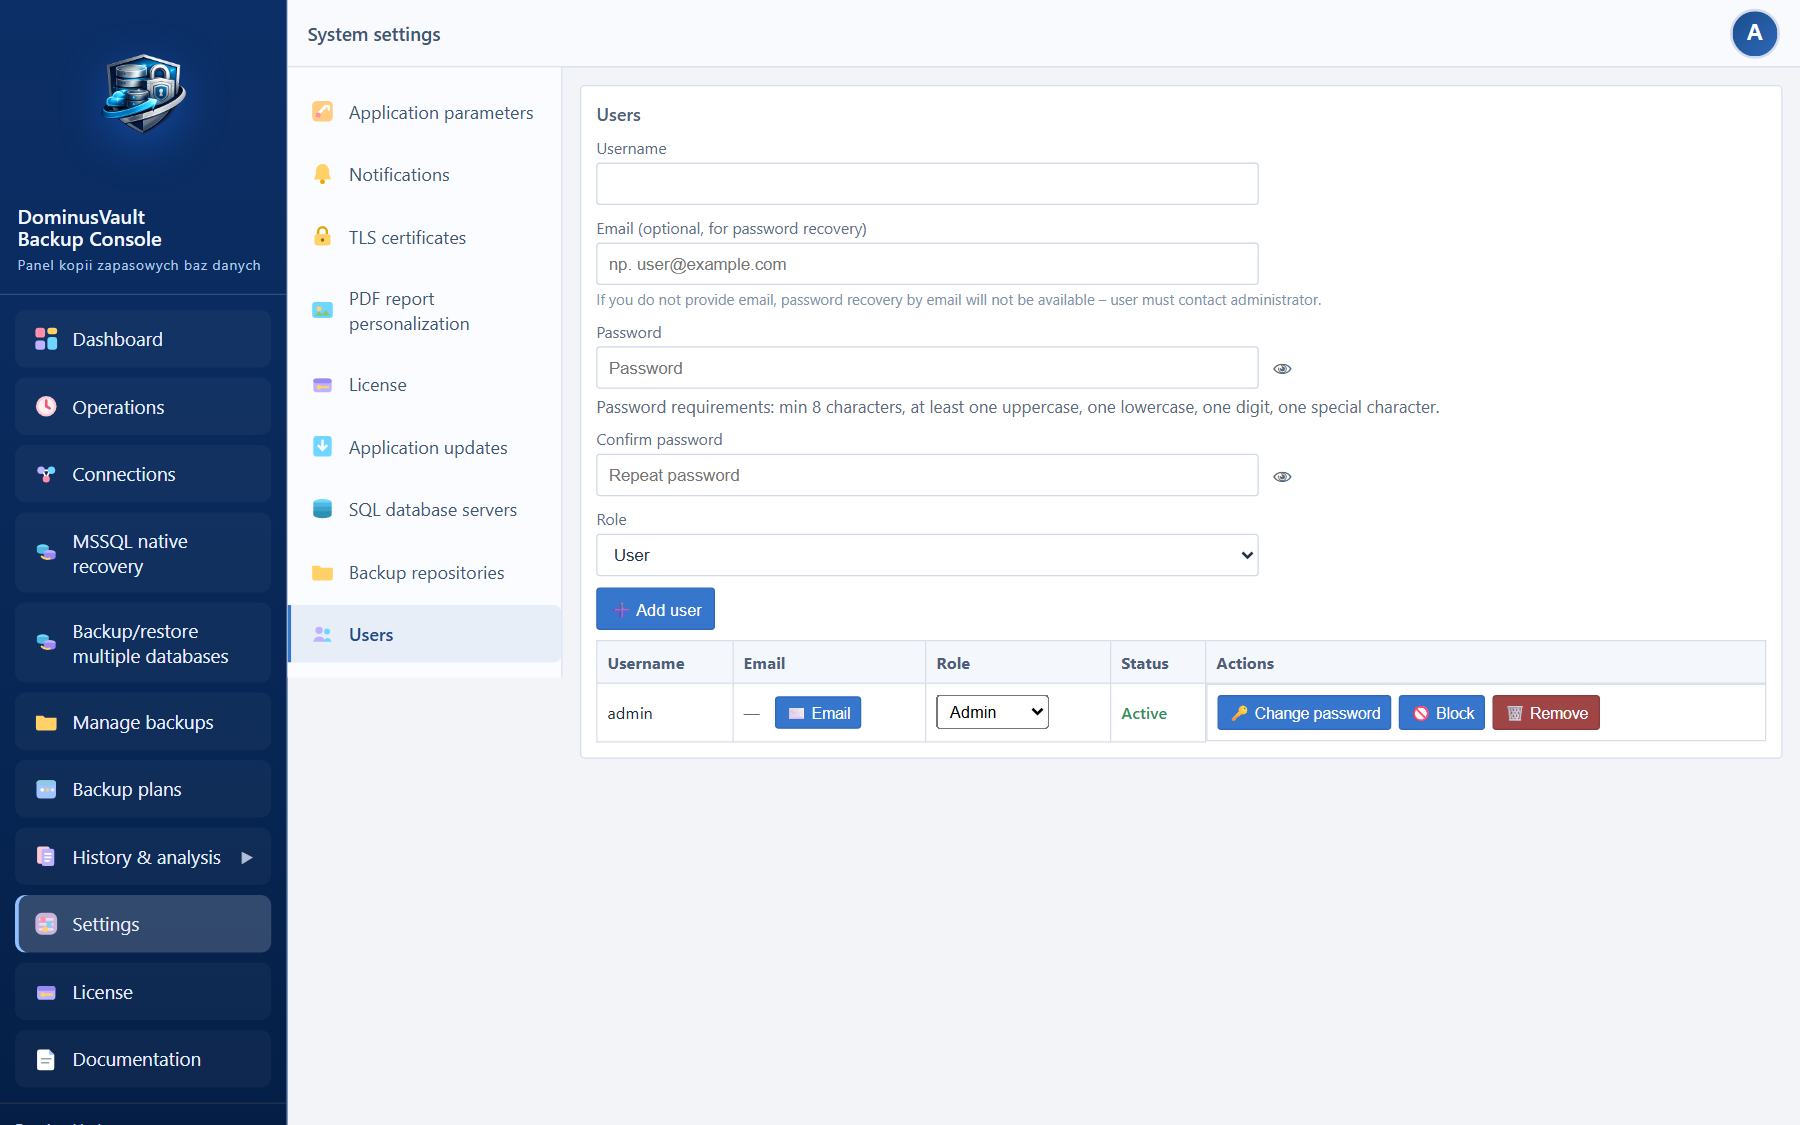
Accounts are created with either the administrator or the user role. On top of that you can restrict:
| Panel section | What it allows |
|---|---|
| Dashboard | Status, alerts and quick actions |
| Operations | Progress of parallel jobs and the persistent operation history; available with Dashboard, Plans or Backup permission |
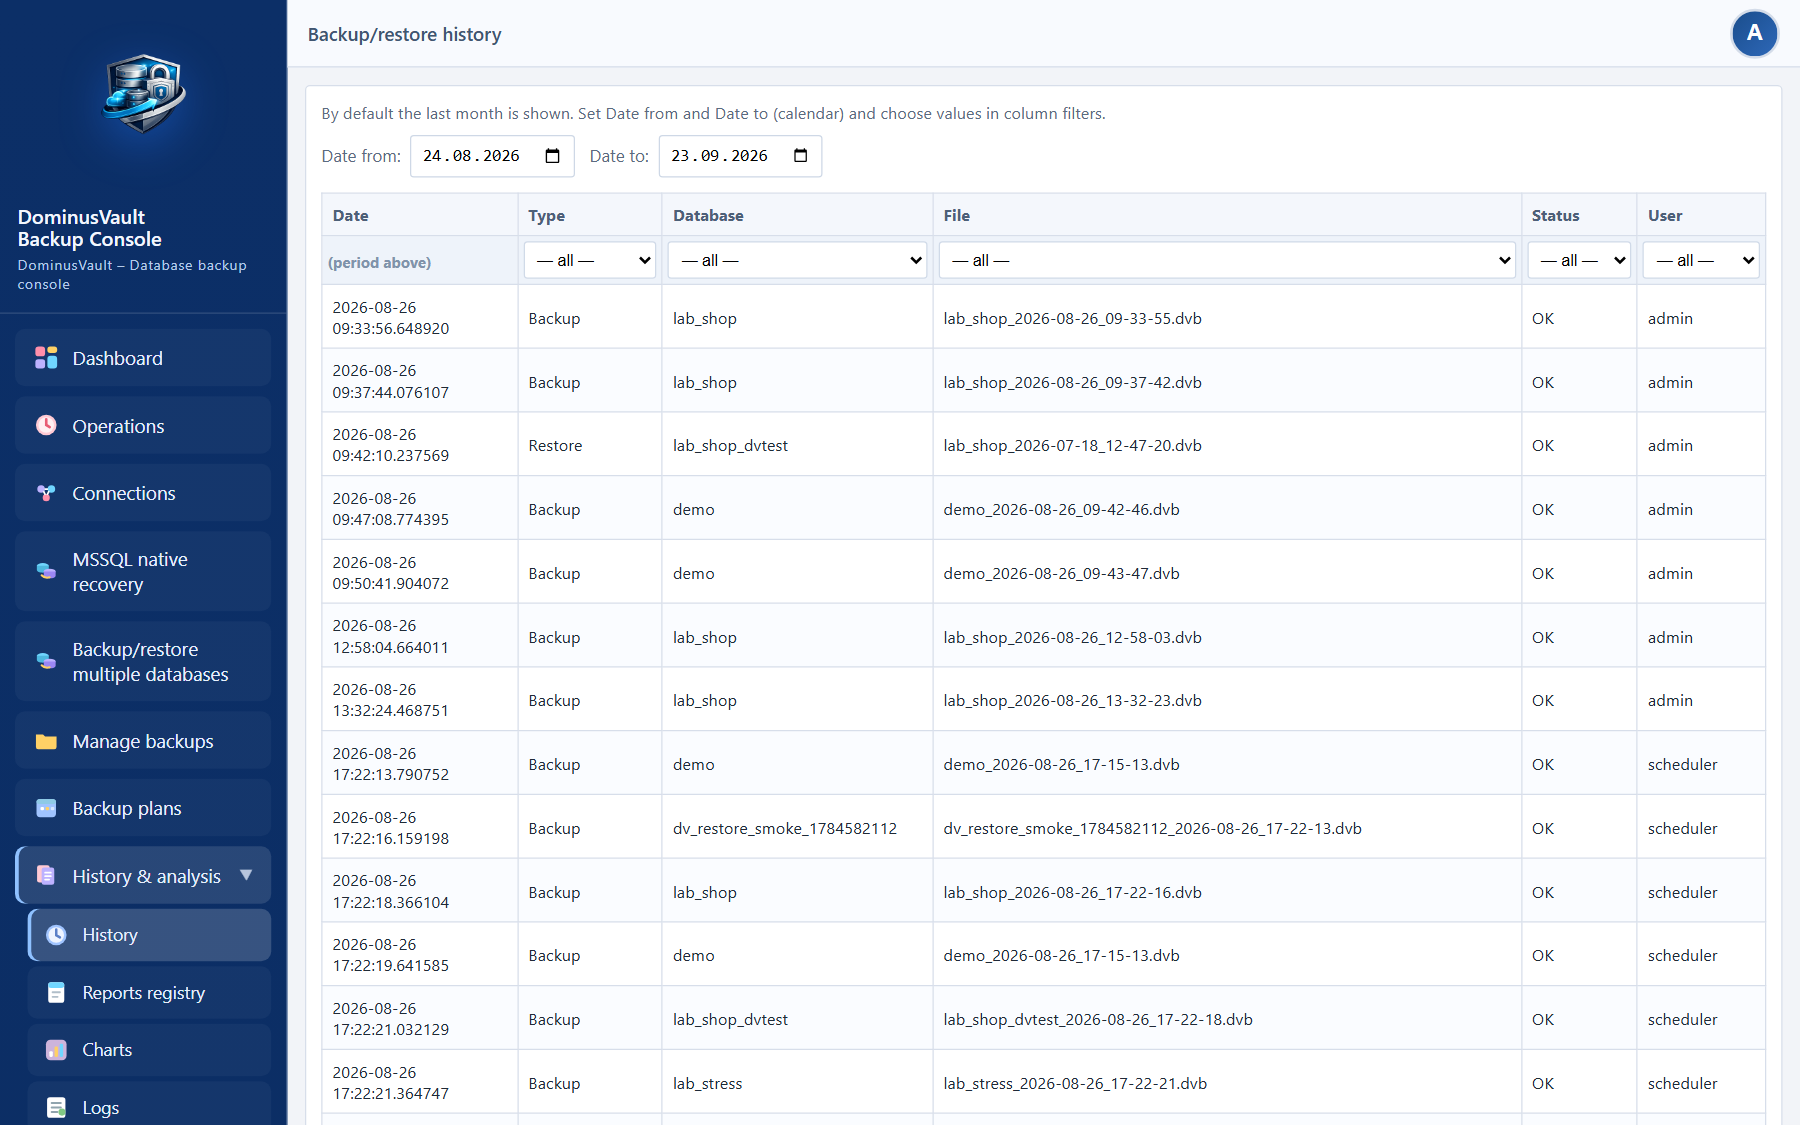
| History | The list of completed backups and restores, in the History & analysis group |
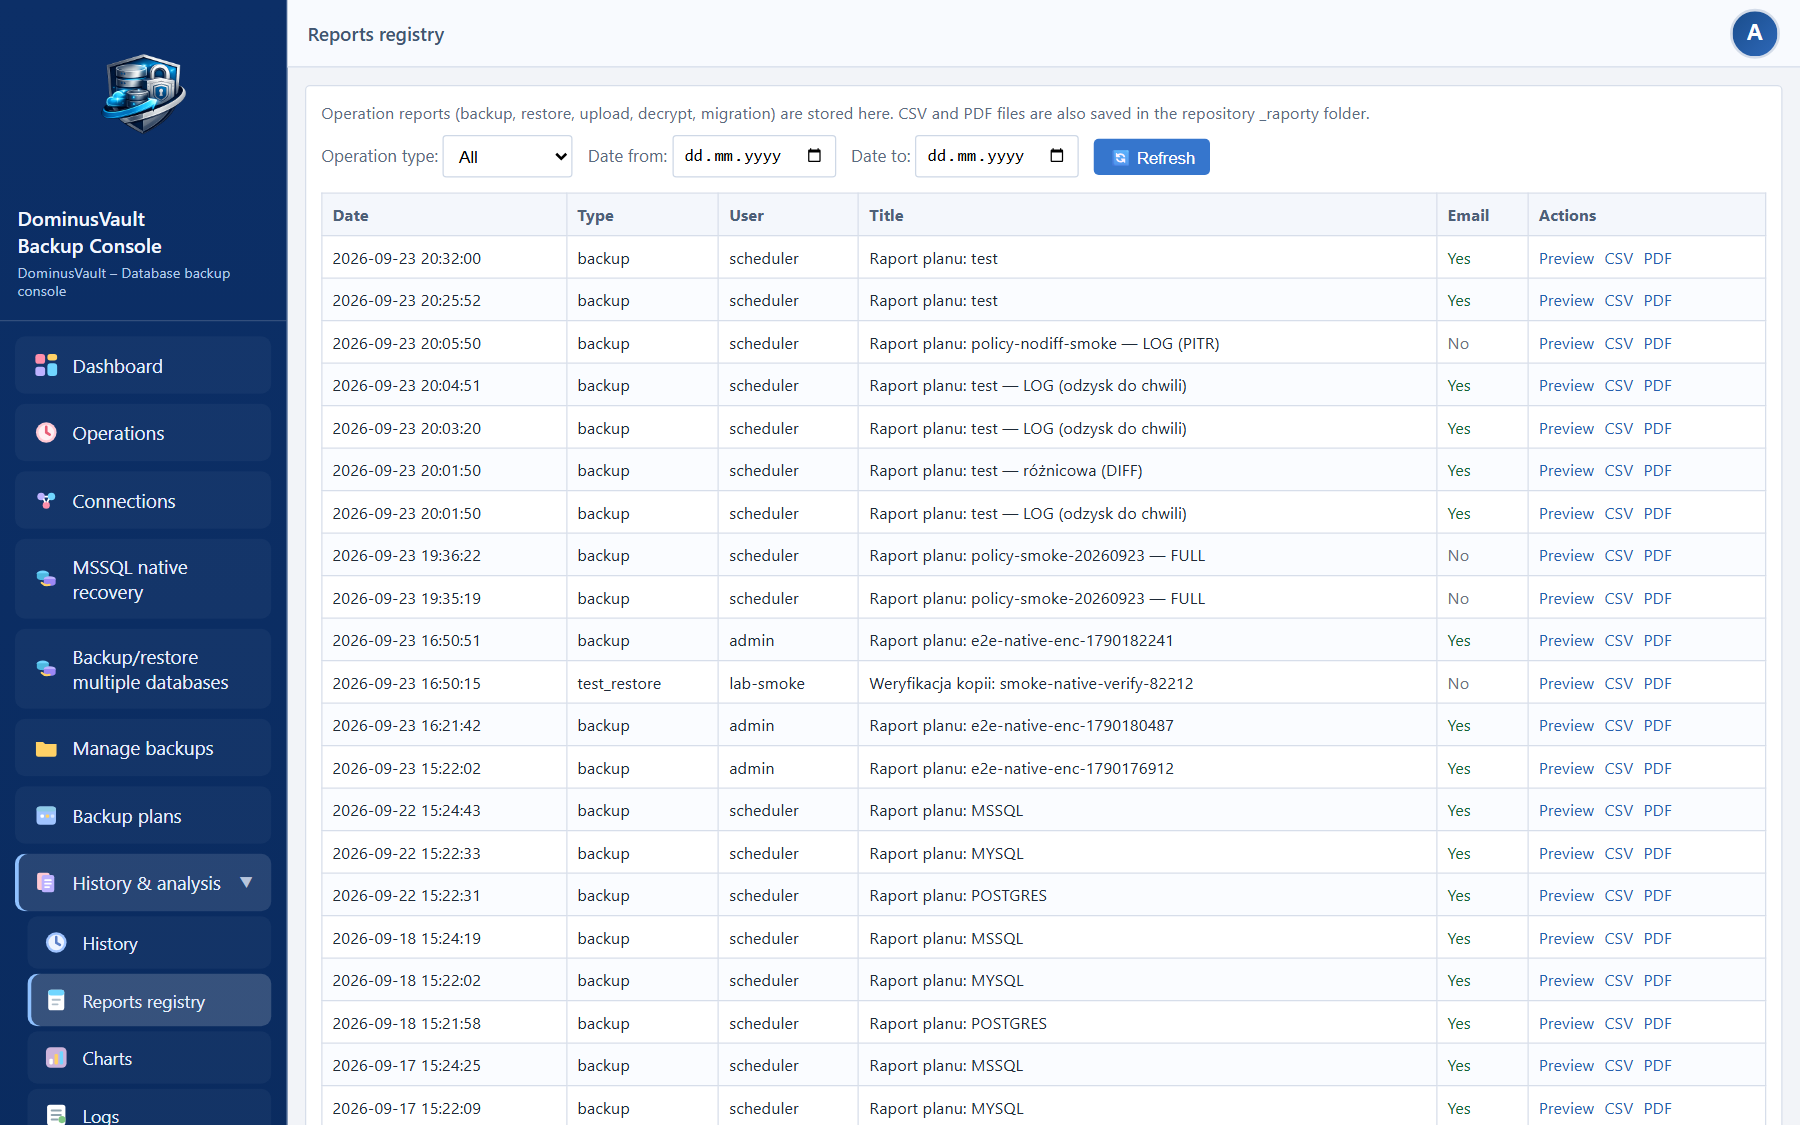
| Reports | The registry of operation reports in CSV and PDF, with in-panel preview, filters and downloads; needs the Reports permission |
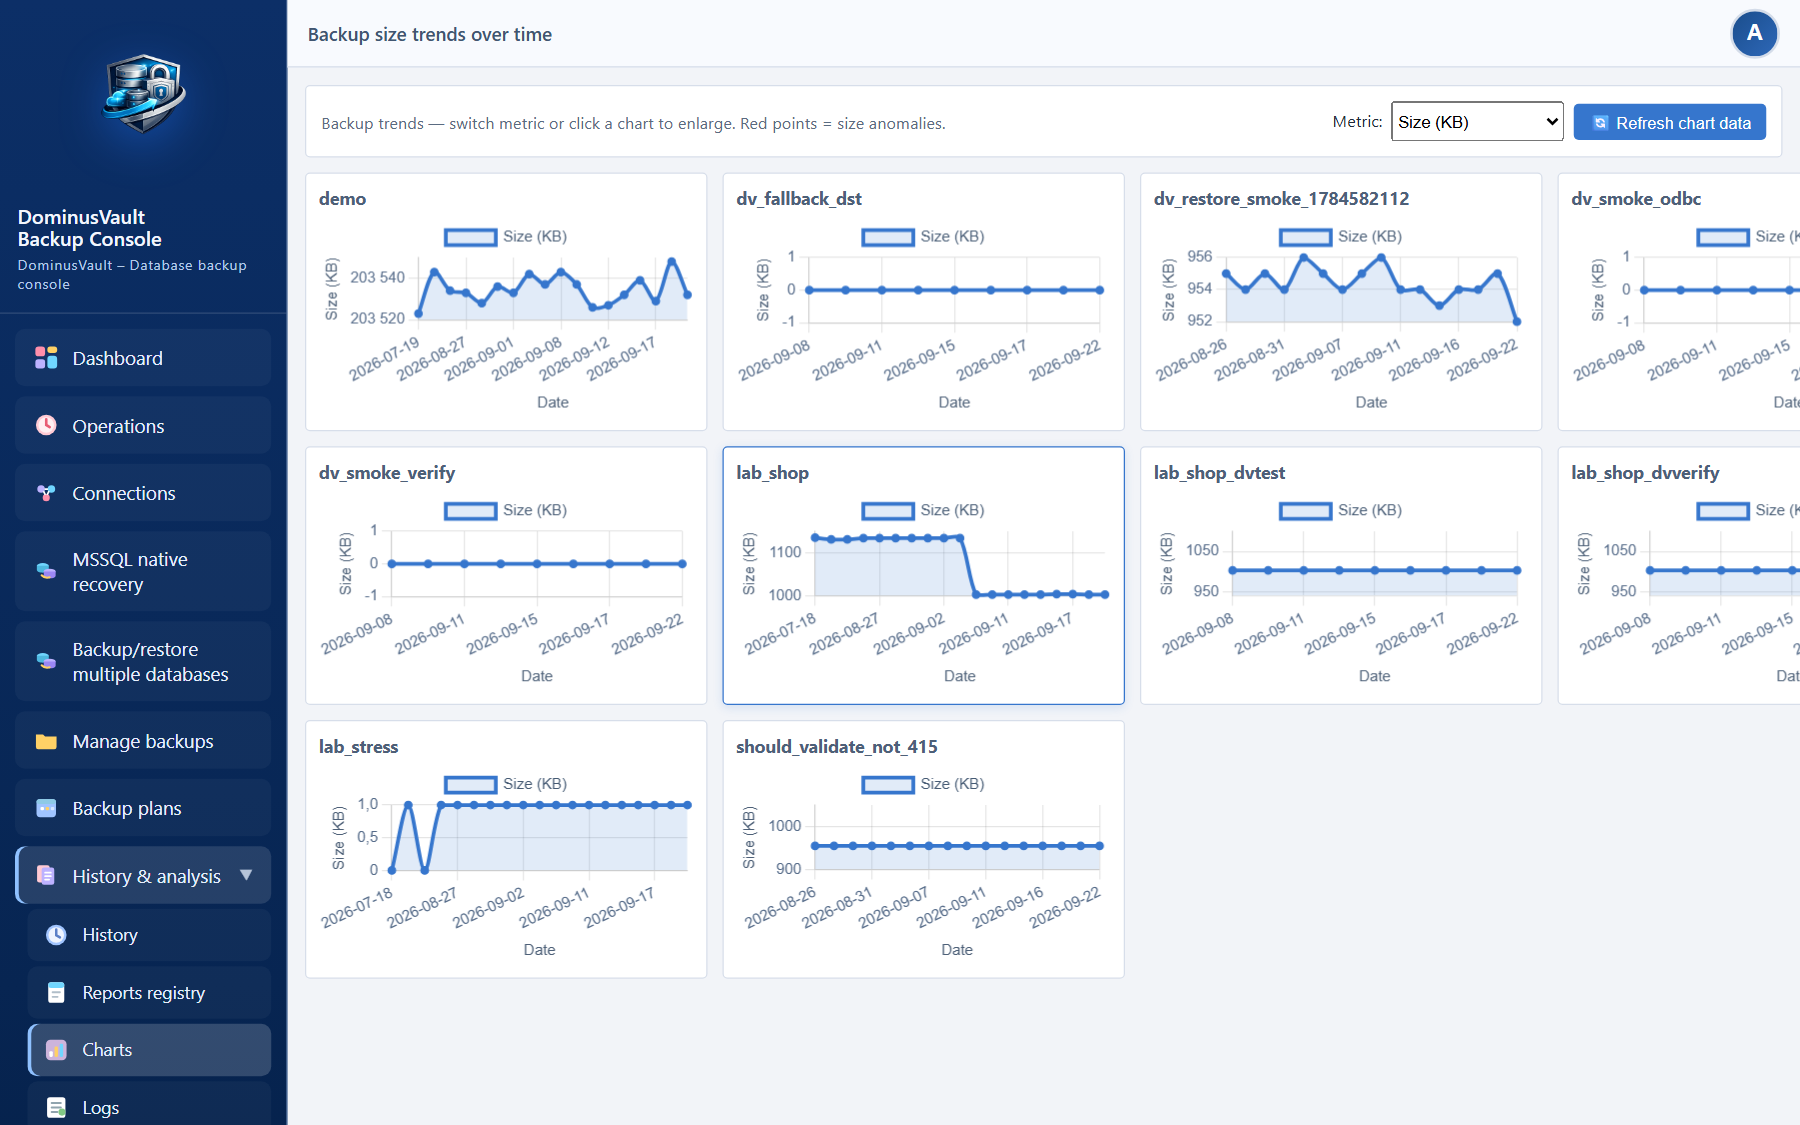
| Charts | Backup size and duration trends, with size anomalies marked |
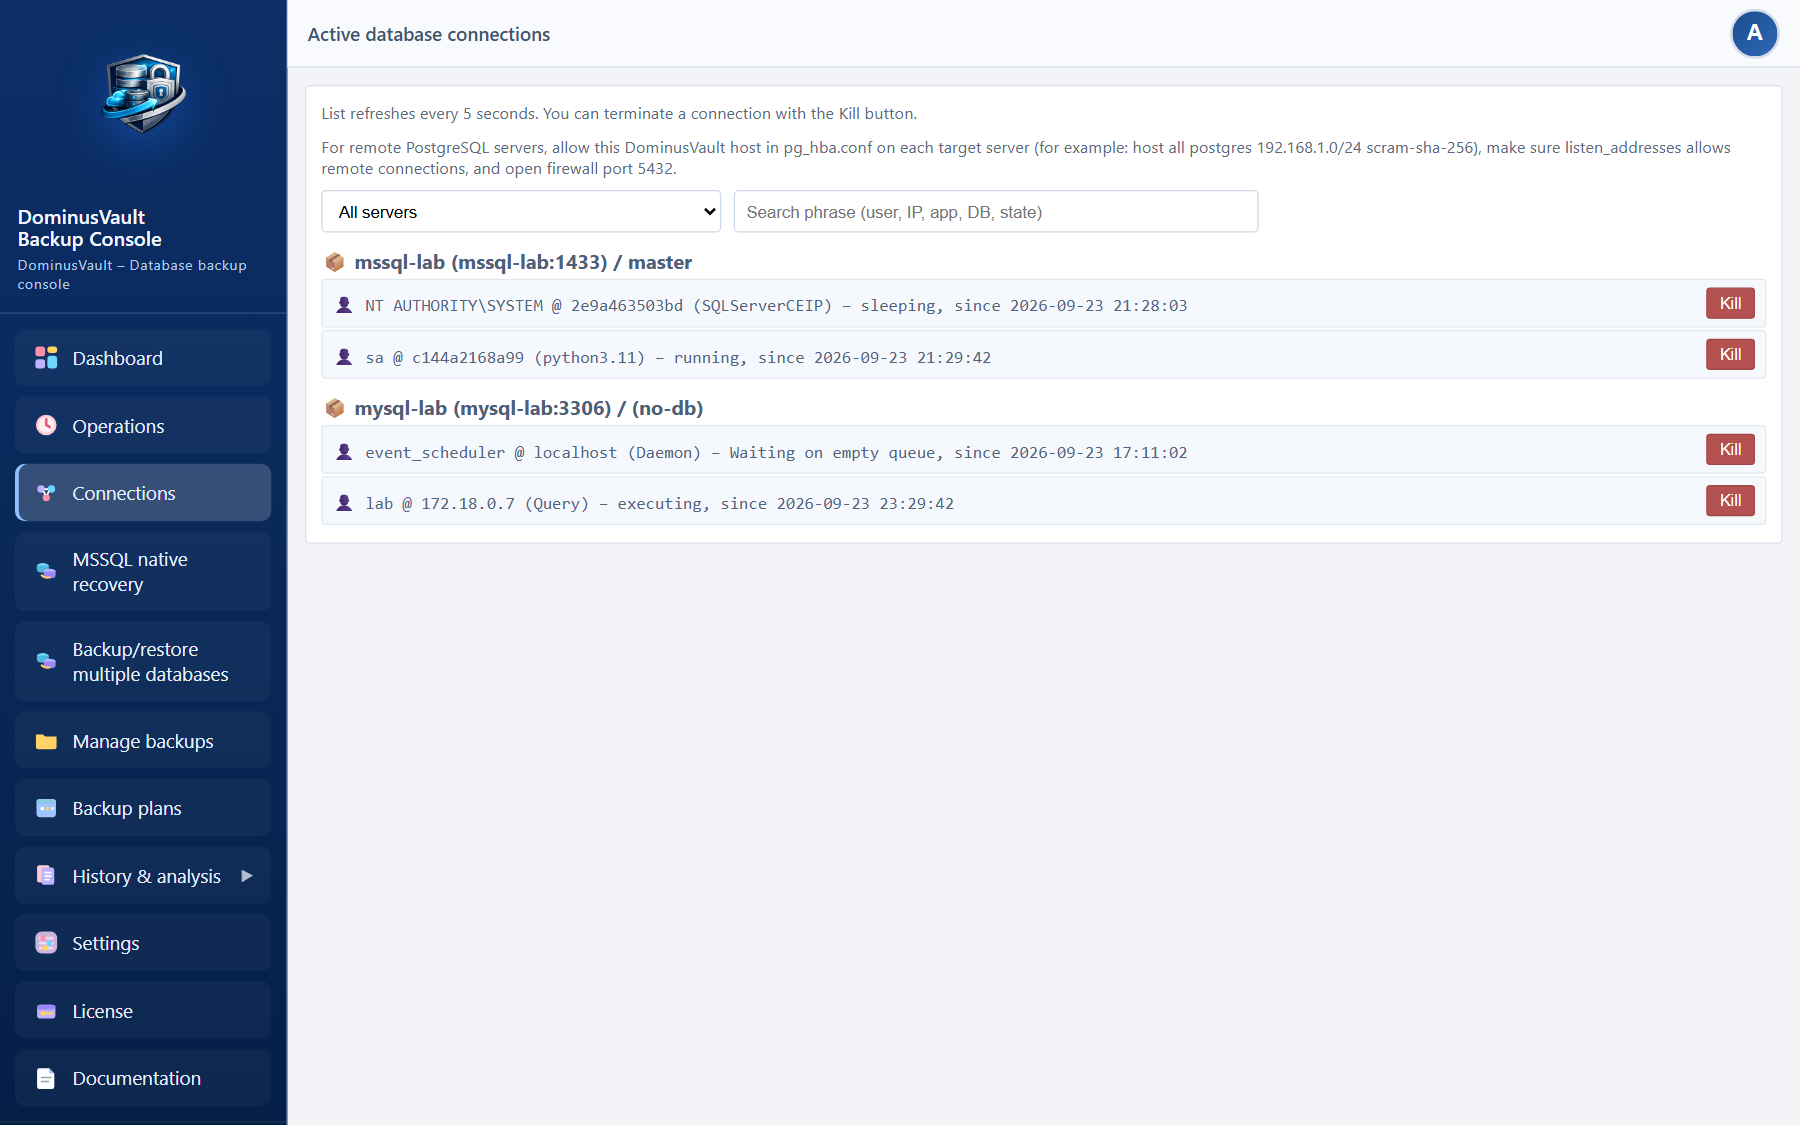
| Connections | Active sessions on the database servers |
| Backup/restore | Running backups and restores |
| Backup plans | Viewing plans and running them manually |
| Settings | System configuration, normally administrators only |
| Logs | Application and audit logs, in the History & analysis group |
| License | Slot usage overview and package comparison; activation stays in Settings |
How to grant the Reports permission:
Administrators can reach every section by default. An account with the user role and no Reports tick will not see the registry, although it can still use the dashboard export if it has dashboard access.
Under Settings → Notifications you configure:
0 means nothing is deleted automatically,After every operation, meaning backups, restores, uploads, decryption, migration and verification, the system saves a CSV and PDF report in the Reports registry and in the reports folder inside the repository.
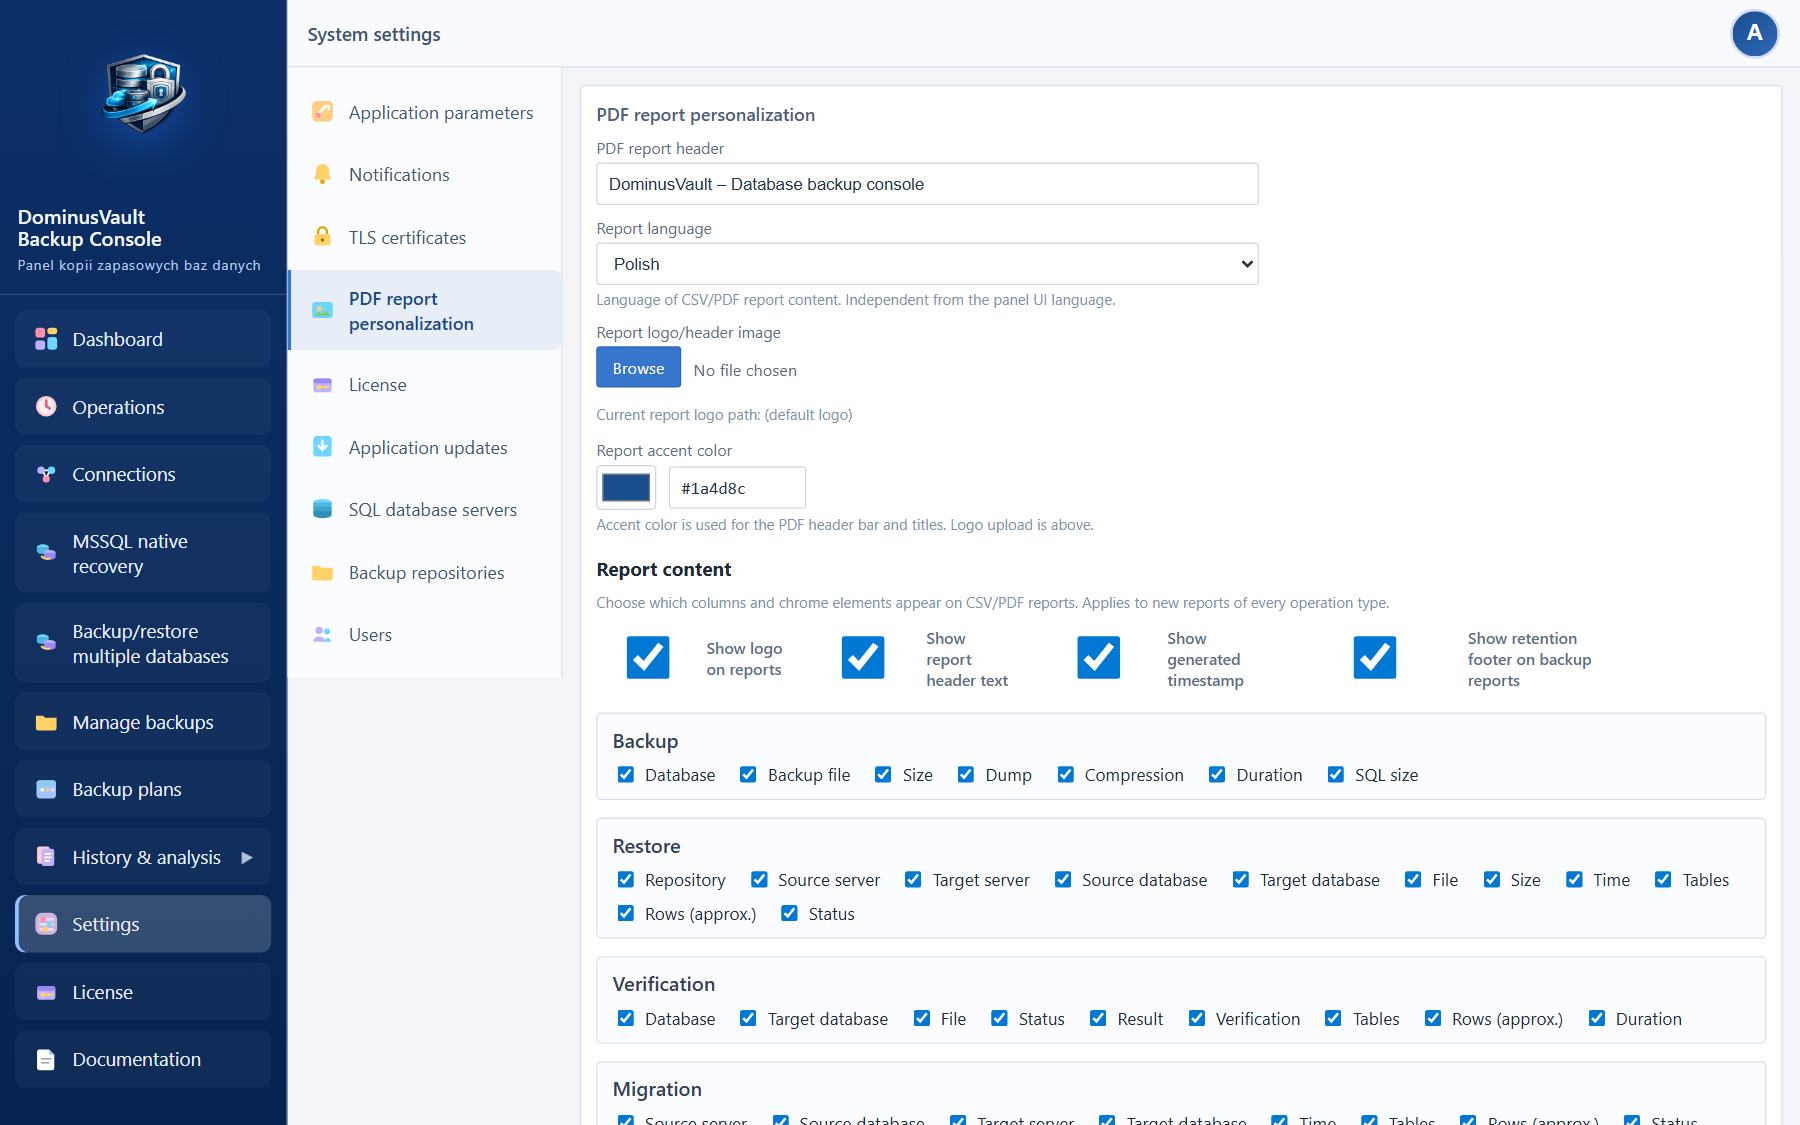
Under Settings → PDF report personalization you set:
In the reports registry you can look at the table and the PDF in the panel itself, without downloading anything.
On the dashboard, the Got it button hides an alert. It comes back if the problem is fixed and then returns.
DominusVault works with one master key, set in the first-run wizard. The key does two jobs:
The key itself lives in the installation's secure store: the program data folder on Windows, the application data volume in Docker. Keep a copy of it in your organization's password manager. Losing the key means you can decrypt neither the backups nor the stored passwords.
In a Docker installation the script already places the key in the .env file. The first time you open /setup, leave the key field empty so that exactly the same key is used. Otherwise .env, the key store and the database will drift apart.
The time in a plan, 02:00 for instance, refers to the application time zone. You set it in the panel: Settings → Time zone (Europe/Warsaw by default).
If a plan "did not run overnight", check in turn whether DominusVault was on at that hour, whether the plan list shows a last run, what the logs say, and which time zone is set in Settings. If the app was off at the scheduled time, it still runs that plan once for that day (or week / month) after it starts — you do not need to start it by hand unless the run was interrupted mid-way.
| Operation | Guidance |
|---|---|
| Backing up a large database | Free repository space at least equal to the database size. How long it takes depends mostly on the network and the disk. |
| Verifying or restoring a large database | Count on at least 4 GB of RAM and several GB free on the temp disk. Decompressed SQL is often many times larger than the .dvb file. |
| Parallel jobs | The number of concurrent jobs depends on the license: Free and trial 1, Standard 5, Professional 10, Enterprise unlimited. On a modest host, avoid running a large backup and a verification at the same time. |
| Schedule | Plan times use the application time zone, which you set in the panel (Settings → Time zone). |
| MS SQL | For large dumps the import uses sqlcmd when it is available, and it is included in the Docker image. Large SQL scripts put pressure on memory both on SQL Server and on the DominusVault host. |
The Application tab in Settings holds, among other things:
.dvb by default, the product's encrypted archive.pg_dump and psql versions, with a test against the server version.TLS certificates: you can upload your own certificate for the built-in HTTPS, or put a reverse proxy in front of the application.
| Symptom | What to check |
|---|---|
| Docker panel unreachable from another PC | The panel listens on port 8444 on the network — check that port 8444 is open in the firewall. Connect to the server's LAN IP address (its Ethernet or Wi-Fi address). |
| Empty database list on a server | Settings → Servers → Test connection. The host has to be reachable from the machine running DominusVault. |
| Backup decryption error | The key in Settings must be the one the backup was encrypted with. A file from another installation needs that installation's key. |
| Verification of a large database fails | Memory and temp disk space. Run the verification on its own, without a large backup alongside it. |
| Nightly plan with no report | Whether DominusVault was running at the scheduled hour, and which time zone is set in Settings. As a quick check, use the Run button. |
| Backup of 0 B, or ERROR status | The repository access test, write permissions and free disk space. |
| MS SQL backup fails | The port, usually 1433, and a user with backup rights. You also need the ODBC 18 driver, which ships with the Windows installer. |
When you raise a support ticket, include the version from the user menu → Recent changes and the part of the log covering the failure (History & analysis → Logs).
docker-compose.https.yml file from the package, which runs Caddy on port 443.Under Settings → Application updates you can check whether a newer version exists and install it without leaving the panel.
If updating from the panel is not an option, use the manual download link or the procedure below. The change list is in the user menu → Recent changes.
install.cmd on Windows or ./install-linux.sh on Linux..env, which keeps your key and passwords.If the panel reports a problem connecting to Docker, run this in the installation directory:
docker compose -f docker-compose.prod.yml --env-file .env up -d --force-recreate
The Documentation menu opens the guide inside the panel. Administrators can switch between the user guide and the administrator guide with the button on the left or the link at the top of the page. Additional HTML files may sit in the installation folder for reading in a browser without signing in.
You set the default language in the first-run wizard. Each user can then change it for themselves, in the menu under the icon in the top-right corner.
DominusVault – Database backup console. Copyright (c) DominuNet, Maciej Janas.